
Global Sections in BeTheme – Reusable site elements Guide
March 5, 2026
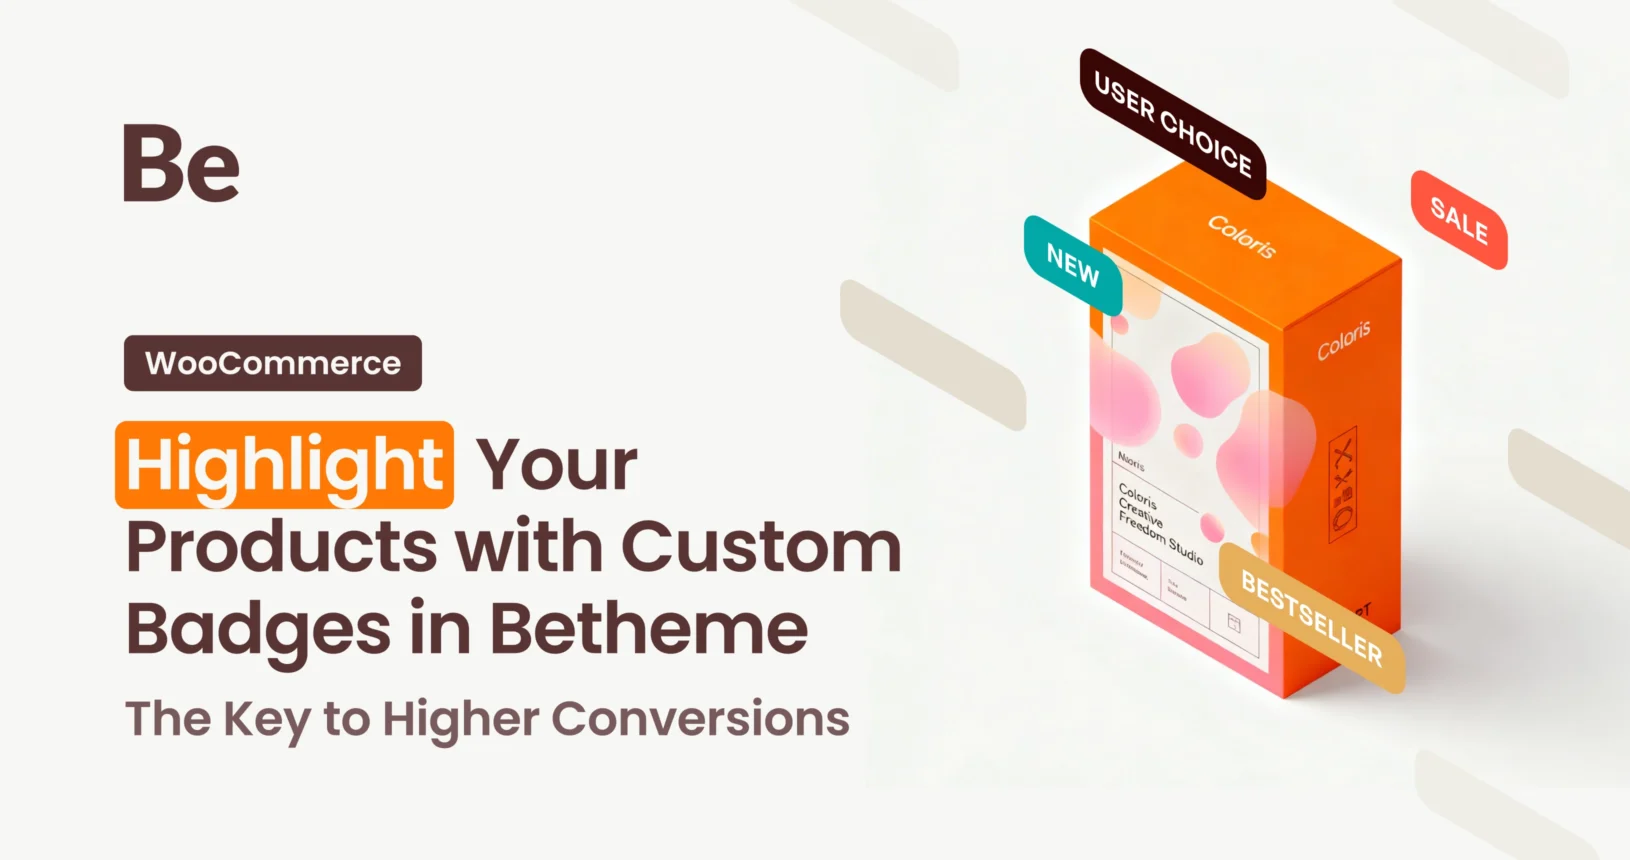
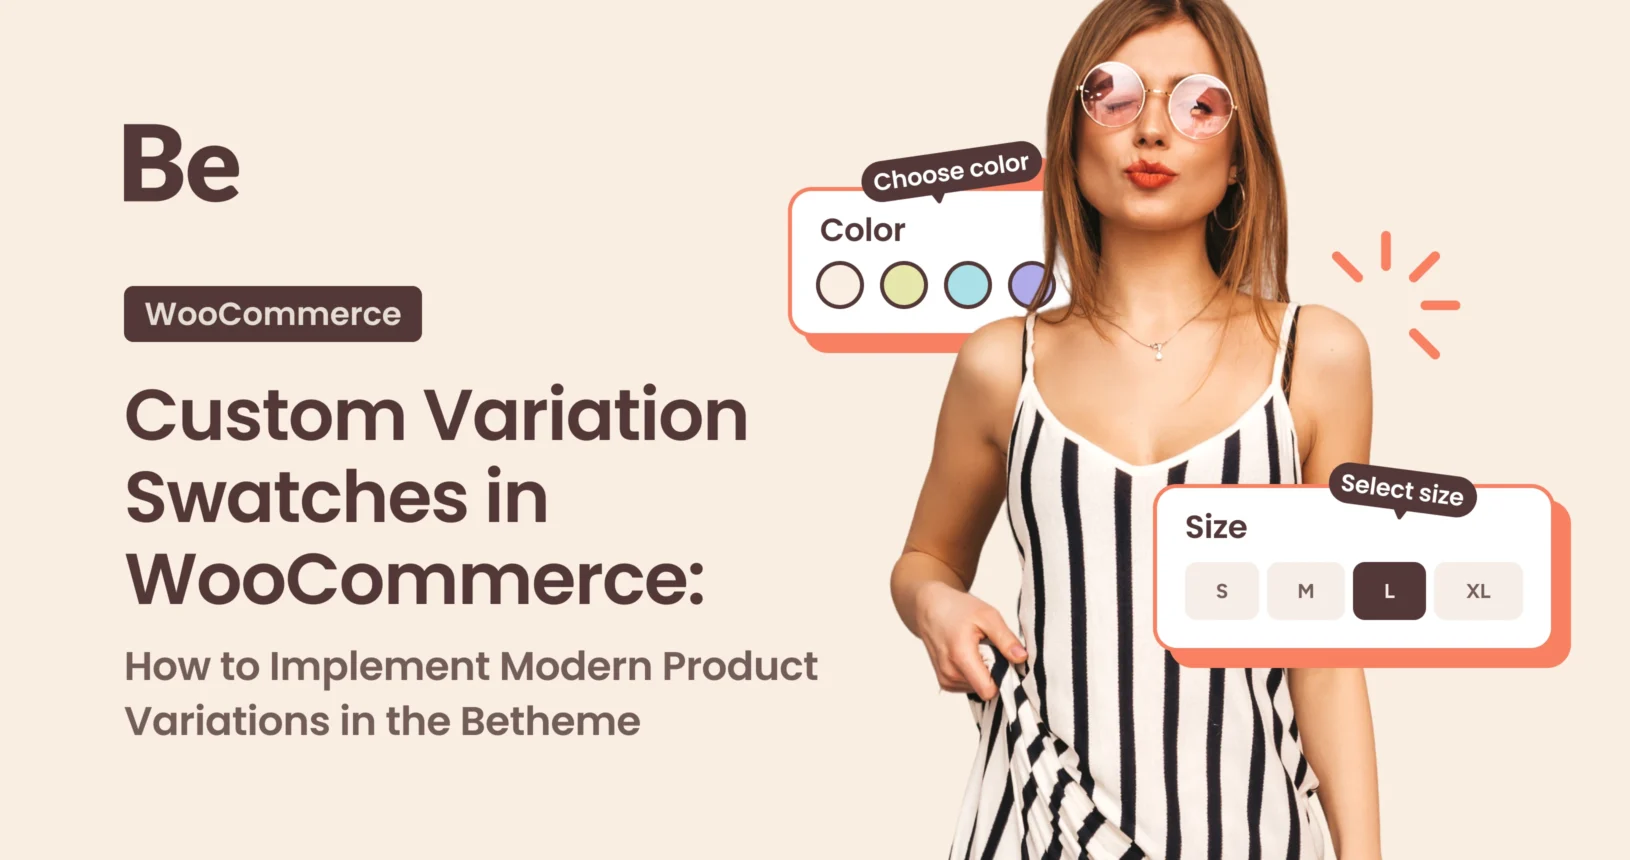
Custom Variation Swatches in WooCommerce: How to Implement Modern Product Variations in the Betheme
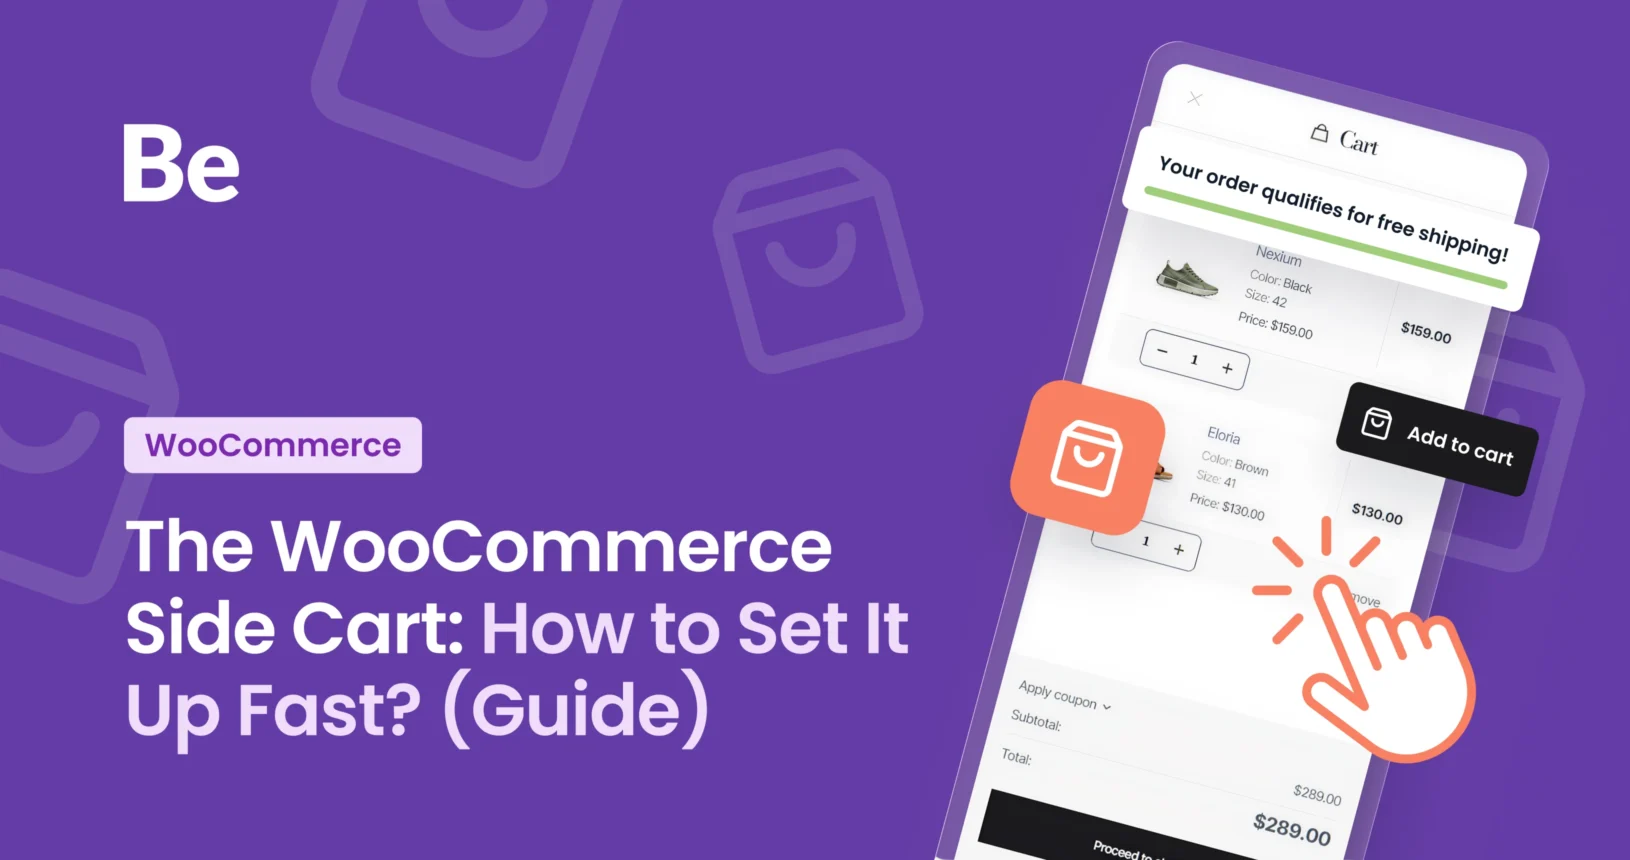
March 18, 2026Capture this: you’re shopping online. You add an item to your cart and… nothing happens. You have to go hunting for that tiny icon at the top of the page just to make sure the product actually made it in there. Annoying, right? You’re in the right place, read about WooCommerce Side Cart in this article.
That’s where a Side Cart (or slide-out cart) comes in. It’s a simple feature, but it works wonders for your customer experience and—more importantly—your bottom line. Here’s why it’s a game-changer.
Integrating a Side Cart into your store is the perfect way to level up your UX (User Experience) and boost conversions. In English: it helps turn browsers into buyers. It lets customers see exactly what’s in their cart without forcing them to navigate away to a separate page. This keeps the momentum going and helps you seal the deal before they have a chance to second-guess their purchase.
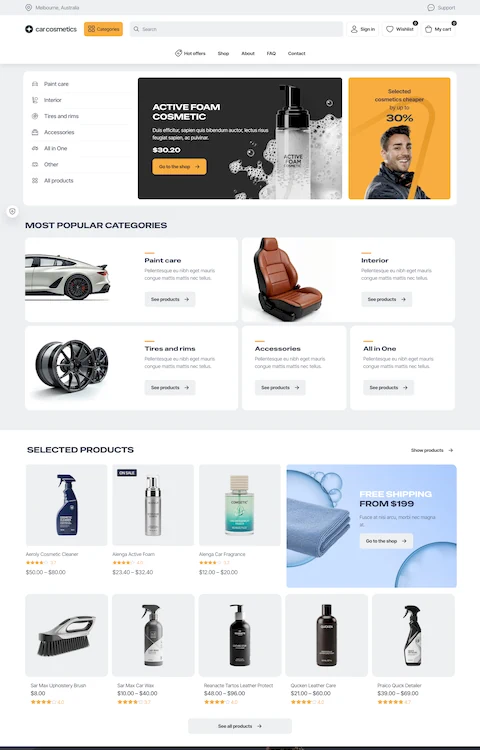
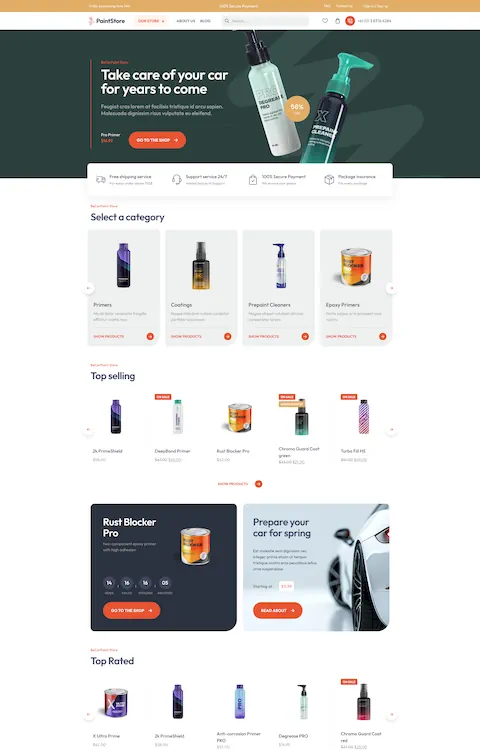
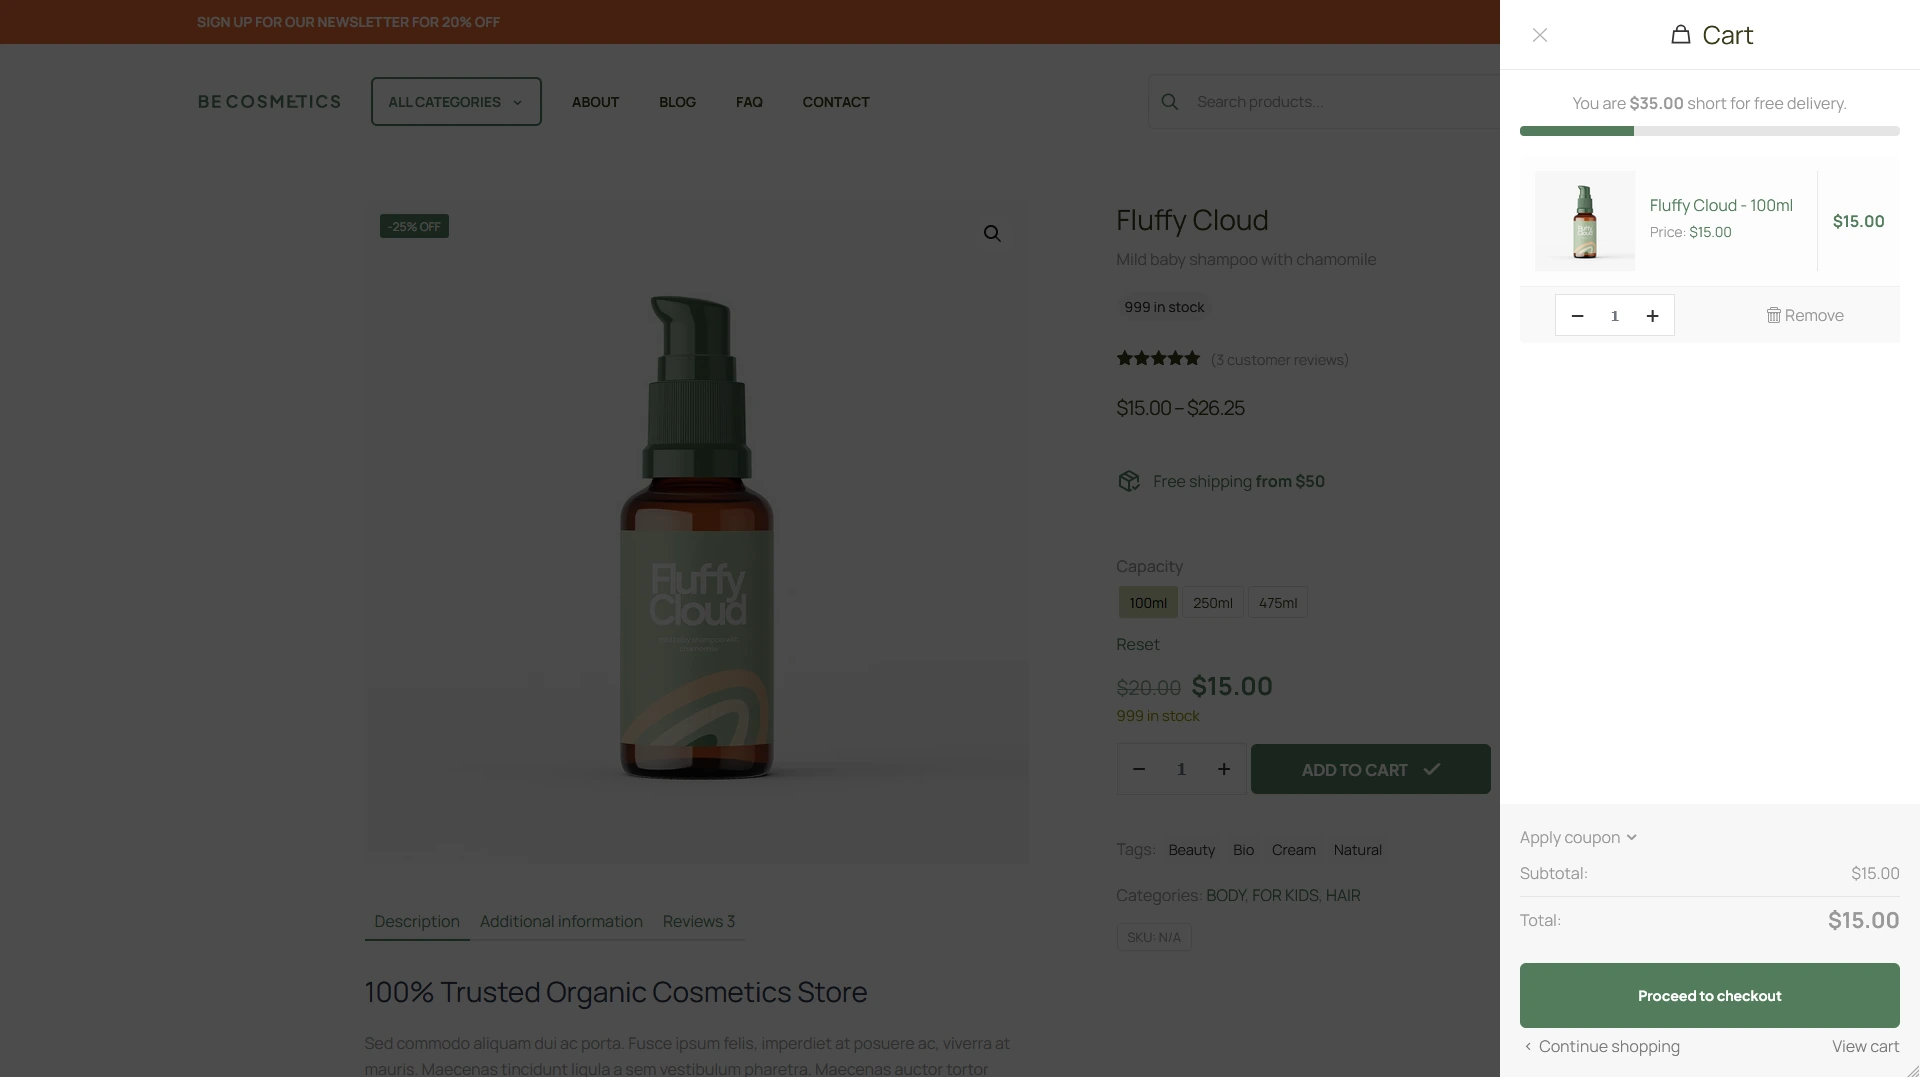
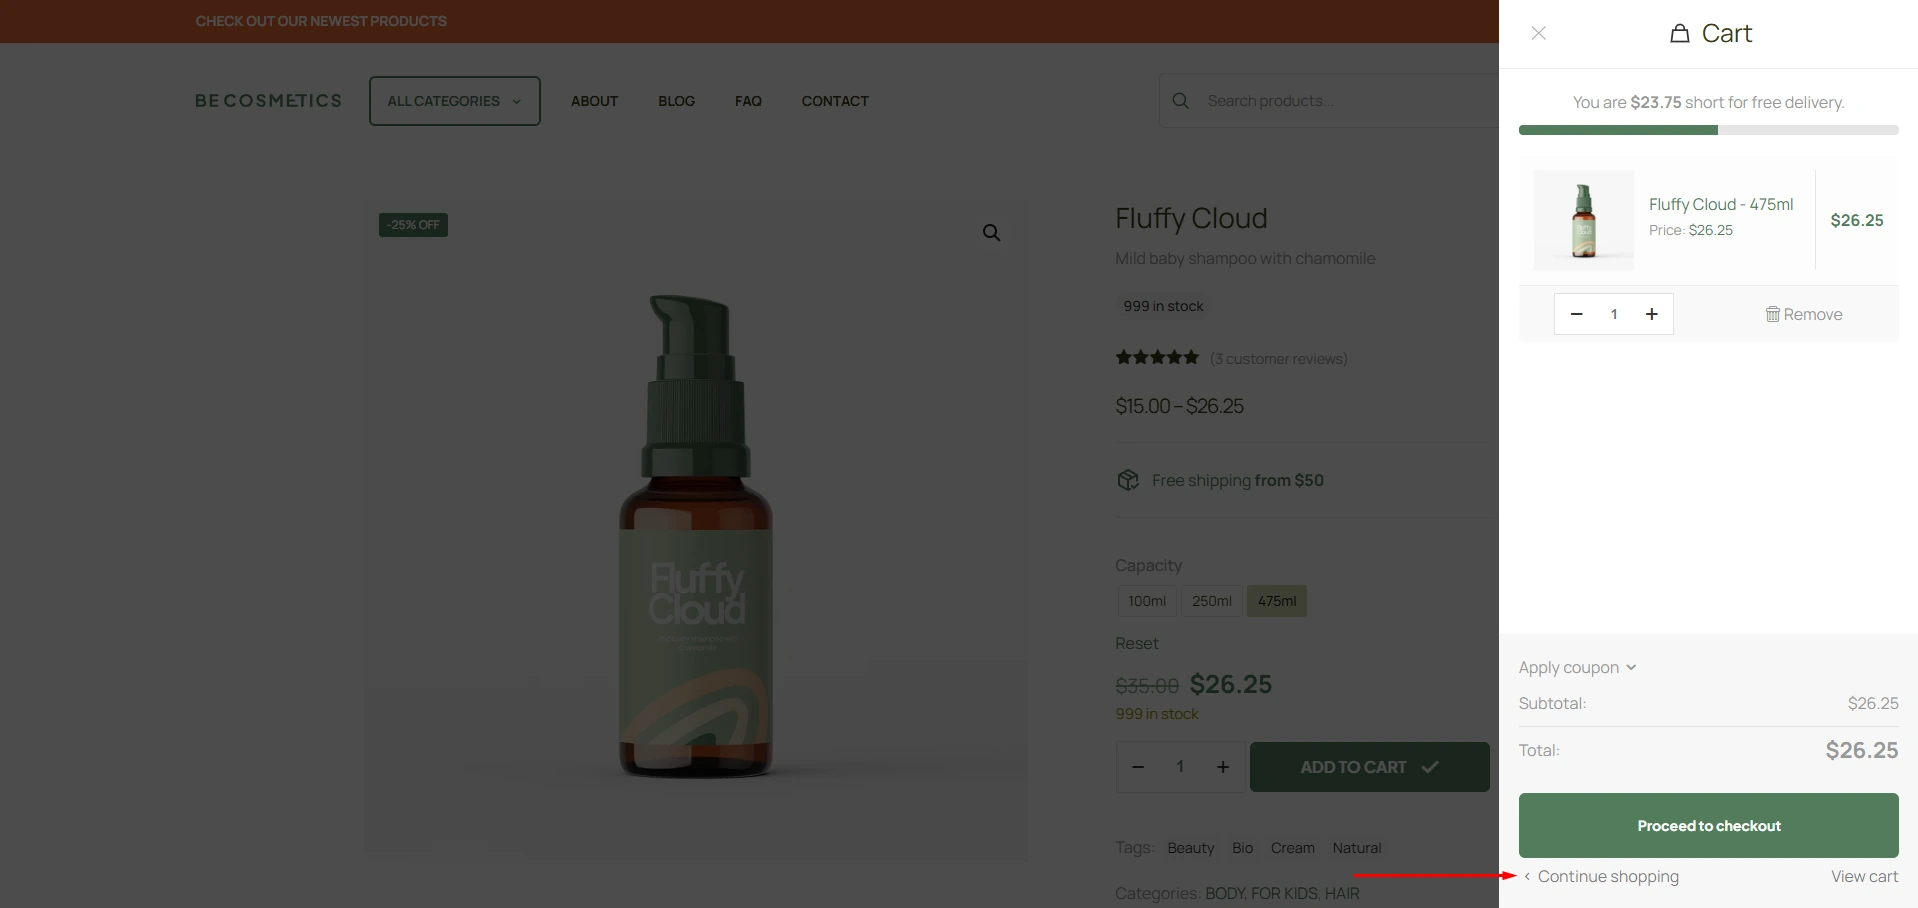
As you can see on the screen from BeTheme Pre-built website Cosmetics4 you can make nice looking Sliding Cart. How? We’ll try to explain it in this article.
Why even bother with a Side Cart?
- Instant Feedback: When a user hits “Add to Cart,” the side cart gives them an immediate visual cue that it actually worked. Like I mentioned earlier, without this, they’re stuck squinting at a tiny icon in the header just to make sure the item is there. It removes the guesswork.
- Zero Interruptions: A side cart doesn’t force a page reload. Your customer stays right where they are—whether that’s on a product page or browsing a category. This is huge thing if you’re selling items that require checking specs, or if you’re trying to encourage them to grab an extra accessory before they head out.
- A Shortcut to the Finish Line: From a customer’s perspective, this is the biggest win. The side cart basically acts as a “mini-checkout.” By placing a “Proceed to Checkout” button right there, you cut out an entire step—no more waiting for a separate cart page to load. It keeps the momentum high and speeds up the whole transaction.
- The Perfect Spot for Perks (like Free Shipping): This is prime real estate for showing a “Free Shipping” progress bar. You can instantly show the customer how much more they need to spend to unlock a deal. Since their eyes are already locked on the cart, it’s the best moment to nudge them toward a slightly larger order.
| Feature | Side Cart (Slide-out) | Redirect to Cart Page | Small Notification (Toast) |
|---|---|---|---|
| Flow (UX) | High – Seamless; no page reloads. | Low – Breaks the flow with a full page reload. | Medium – Minimal info provided. |
| Conversion | High – Nudges users straight to checkout. | Risky – Can be a turn-off when buying multiple items. | Neutral – Doesn’t really drive action. |
| Upsell Potential | High (Perfect for cross-selling & free shipping bars). | Maximum (Full page estate). | None – Too small for extras. |
| Mobile Experience | Excellent – Feels like a native app. | Standard – Just another page load. | Poor – Often goes unnoticed on small screens. |
What should you watch out for when using a Side Cart?
If your store sells high-ticket, exclusive items where customers typically buy just one thing (e.g. luxury watches or custom-made furniture), a Woocommerce side cart might actually be overkill. In those cases, it’s often better to send the customer straight to checkout to seal the deal immediately. However, for 90% of online stores, the side cart wins on usability every single time.
Pro Tip: Make sure your side cart has a clear “Close” (X icon) button and that clicking outside the panel closes it too. This is a small detail that makes a huge difference in user experience.
Setting Up Your Side Cart
BeTheme is a powerfull of a theme, and since version 25.1, it has a built-in Ajax-powered side cart. That means you don’t need to clutter your site with extra plugins. Here’s how to get it running in a few clicks:
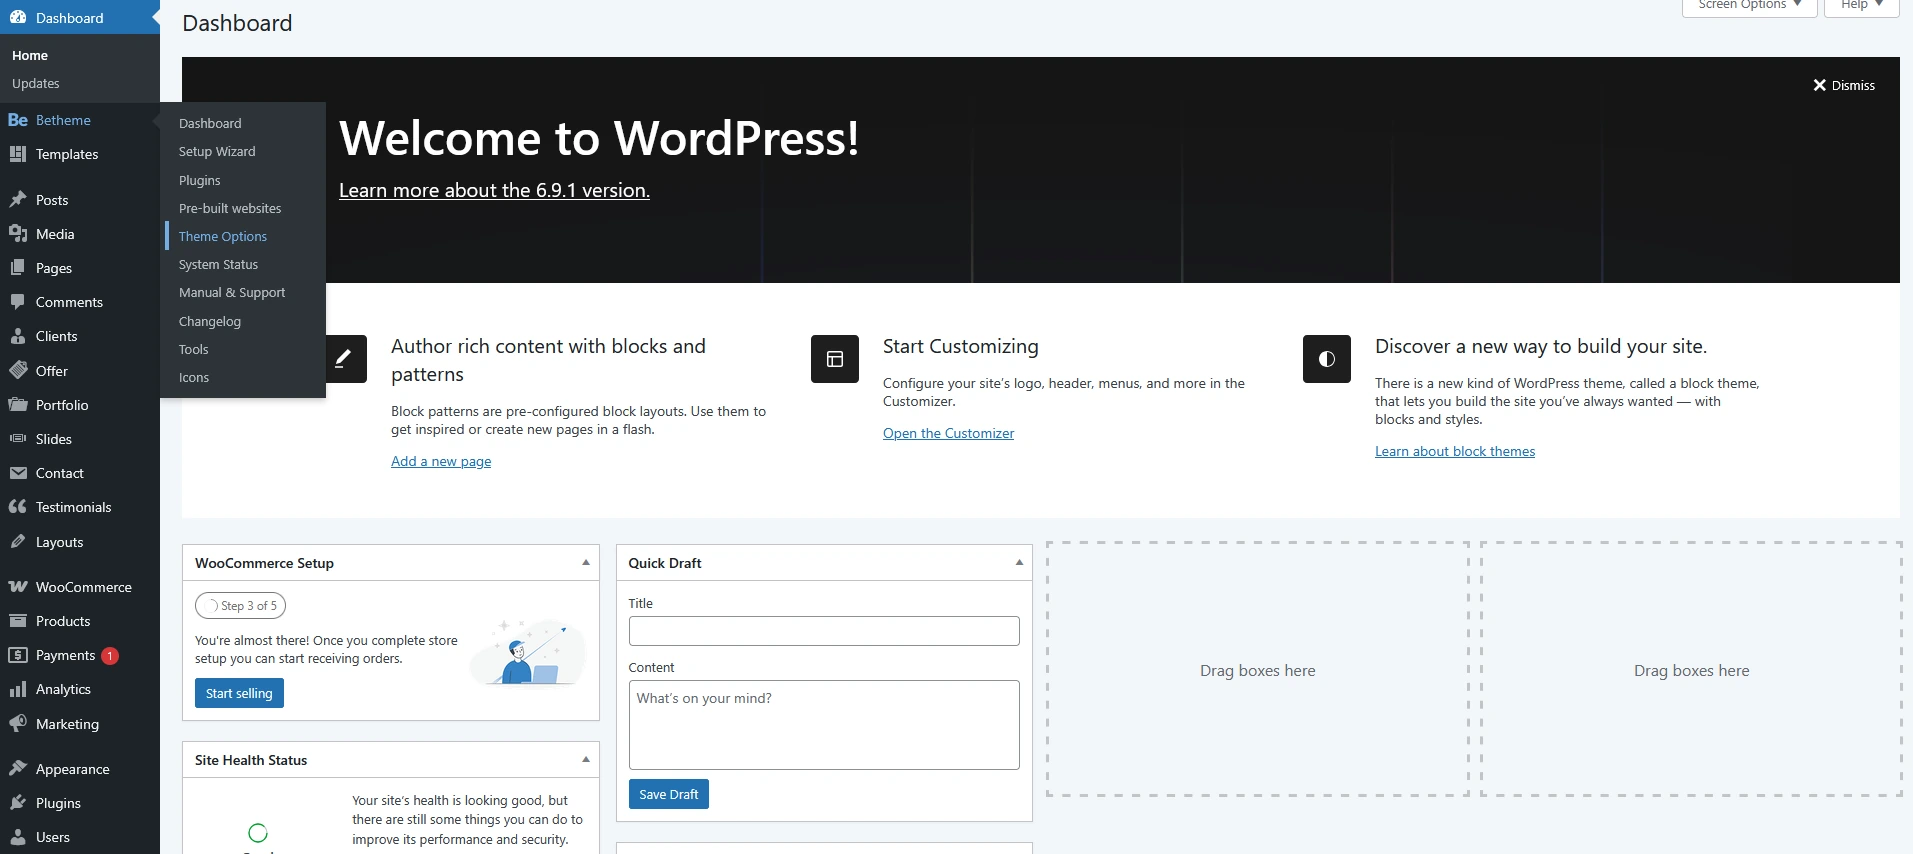
1. BeTheme Theme Options
Once you’re in your WordPress dashboard, navigate “Betheme” from the side panel, then click on Theme Options in the context menu.
2. Shop – Addons
In the Theme Options panel, select Shop, then Addons. You’ll see three options pop up. While we’re focusing on the first one, I highly recommend checking out the others as well—they’re fantastic tools for any e-commerce setup.
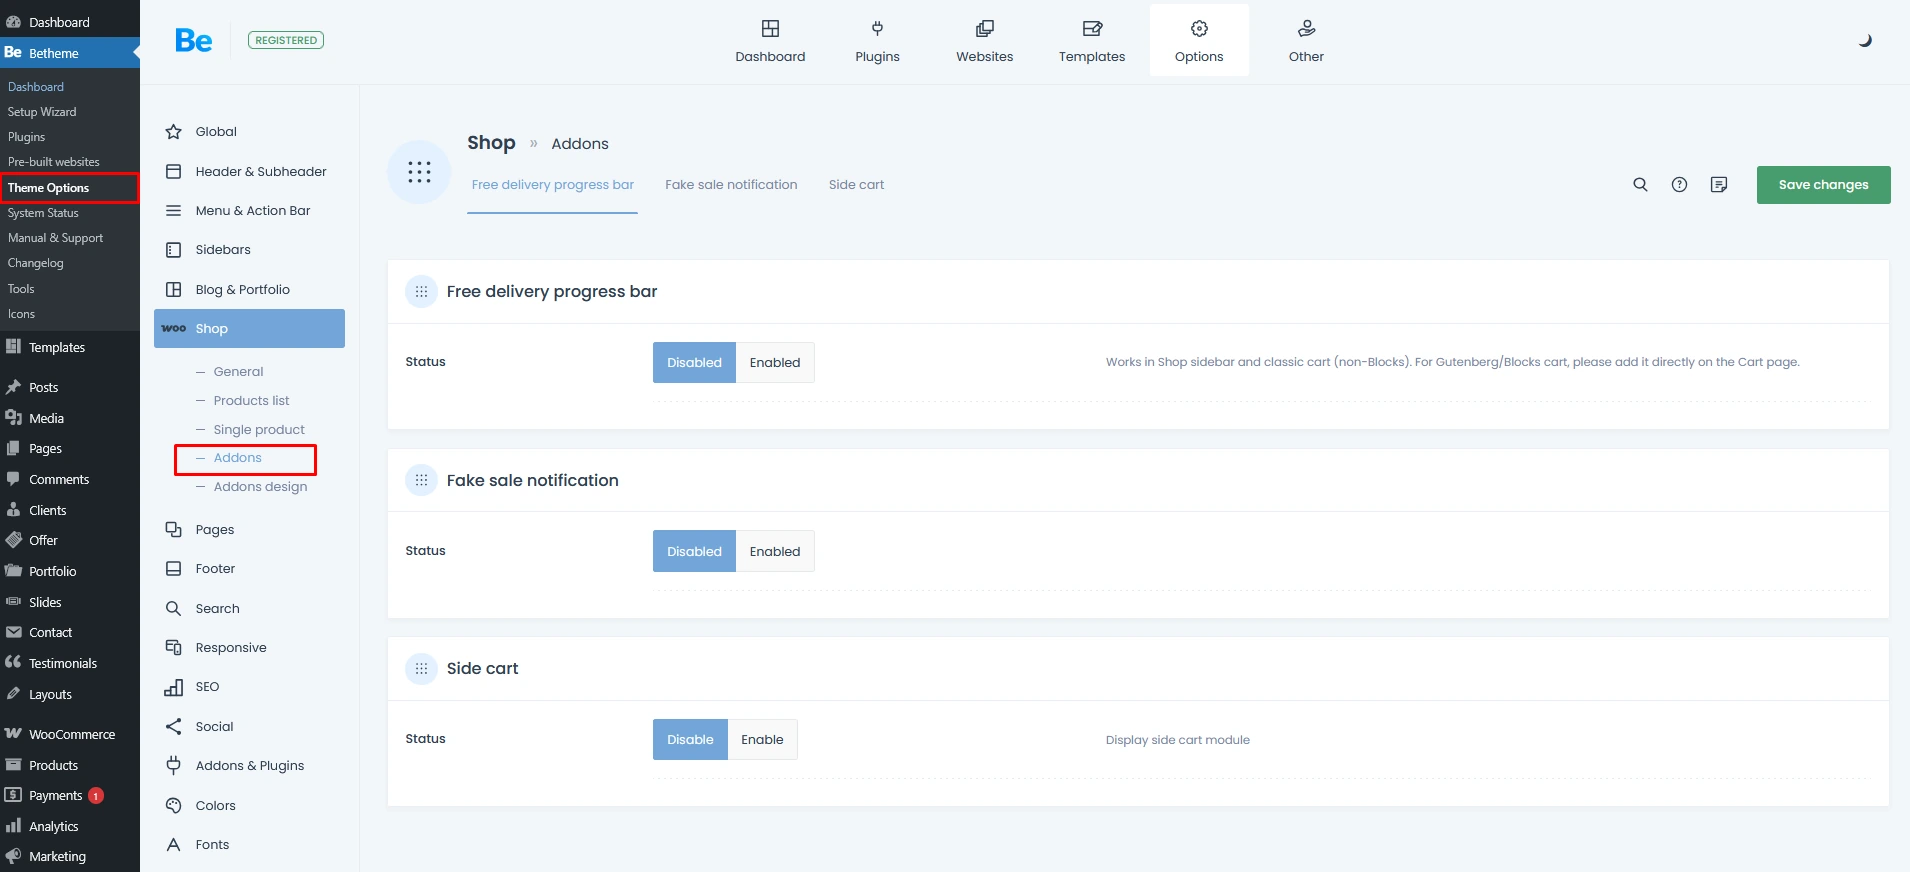
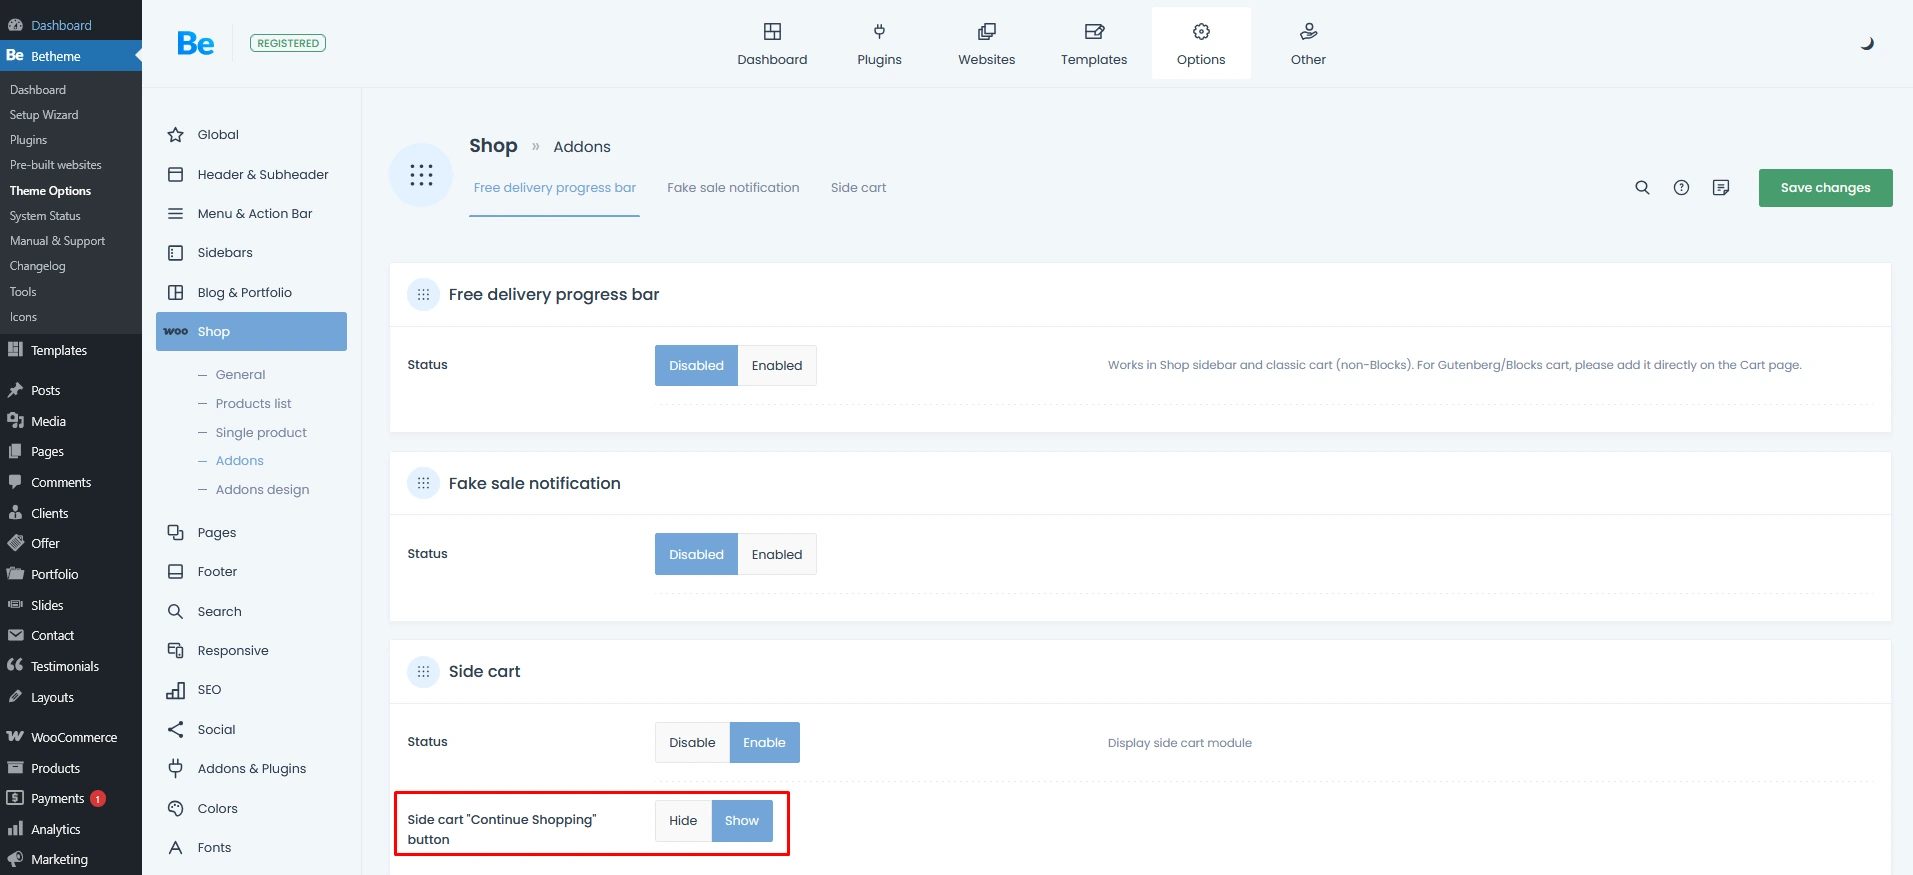
2.1 Side cart
In this panel, just toggle the status to Enable. That’s all there is to it! Now, your WooCommerce Side Cart will automatically slide into view the moment a customer hits Add to Cart and the item is successfully added. It’s that simple.
It’s also worth noting that once you enable the Side Cart, a new option will pop up: the ‘Continue Shopping’ button. You can toggle this to decide whether or not that button appears at the very bottom of the cart panel. It’s entirely up to you.
2.2 Free delivery progress bar
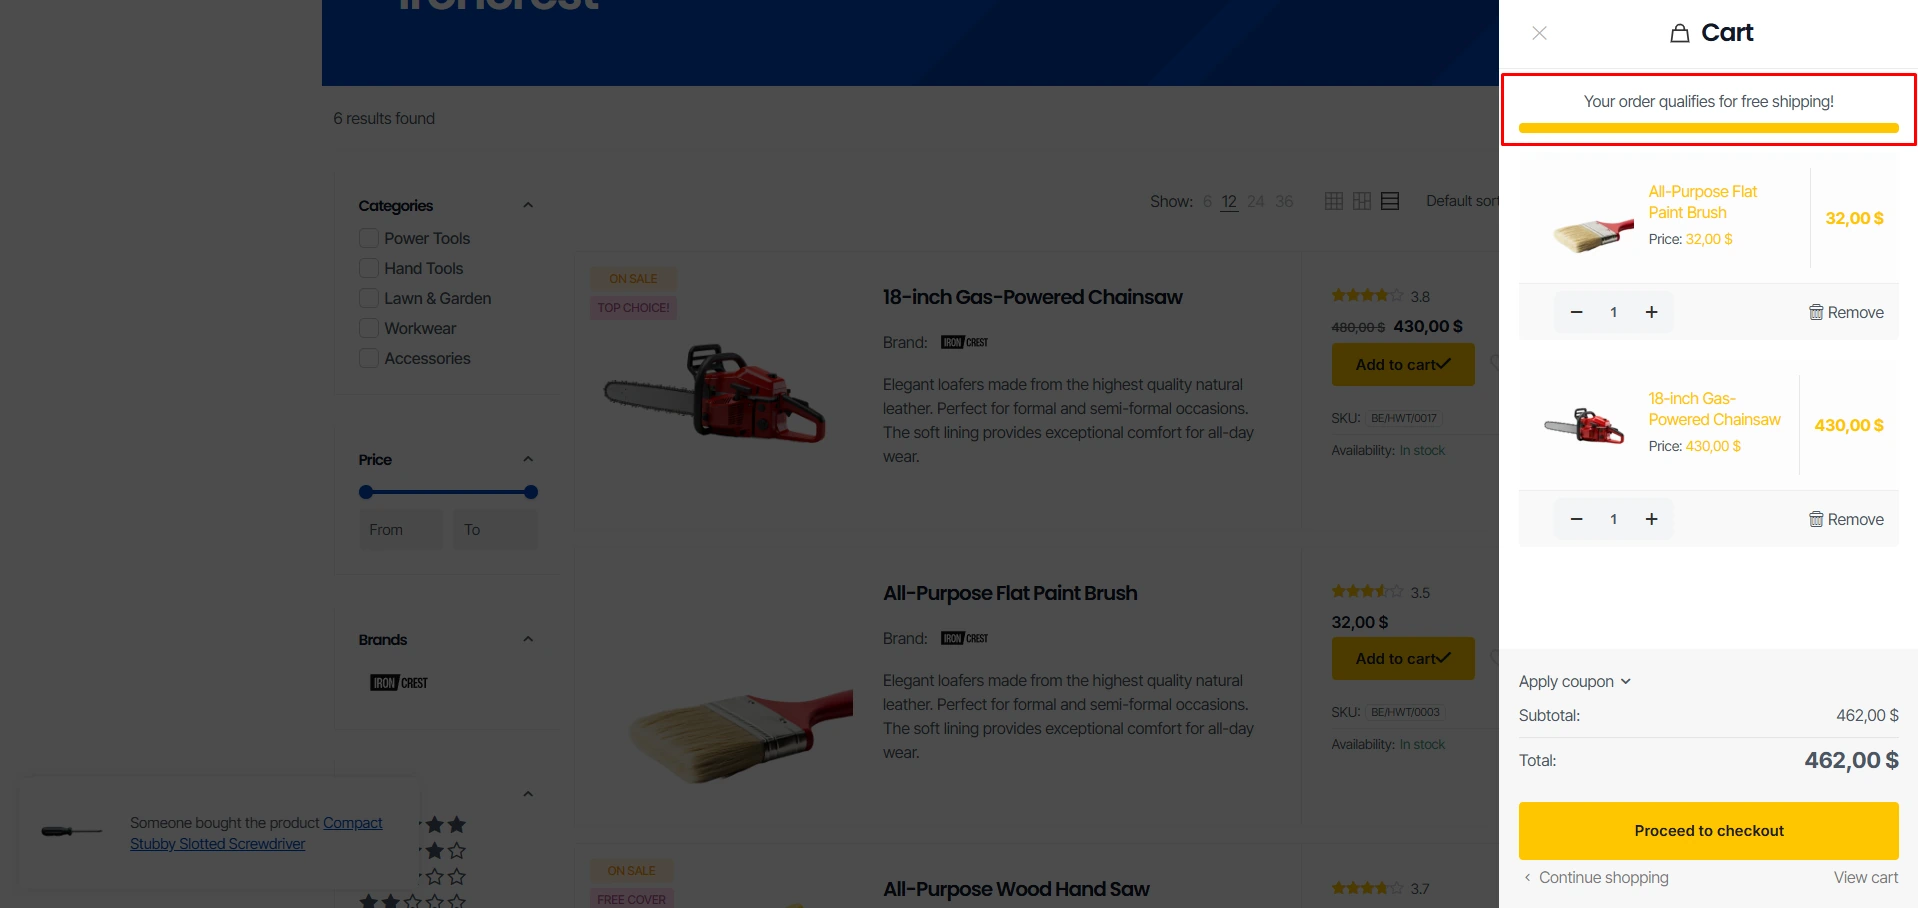
This option lets you display a Free Delivery Progress Bar in both your WooCommerce Side Cart (if enabled) and your standard cart page. One quick heads-up: for this progress bar to actually show up, you’ll need to configure your free shipping settings in WooCommerce first. We’ve got a step-by-step guide on how to do that right here: Free Delivery Progress Bar: The Secret to Boosting Your AOV.
In today’s e-commerce landscape, a free shipping progress bar is one of the most effective tools for driving sales. The logic is simple: if a customer is just $5 away from free shipping, but the shipping fee itself is $4, it’s a no-brainer for them to grab a small ‘filler’ item—like socks or an HDMI cable—rather than ‘wasting’ money on delivery. It’s a win for the customer because they get more value, and it’s a win for you because it boosts your total sale.
2.3 Fake sell notification
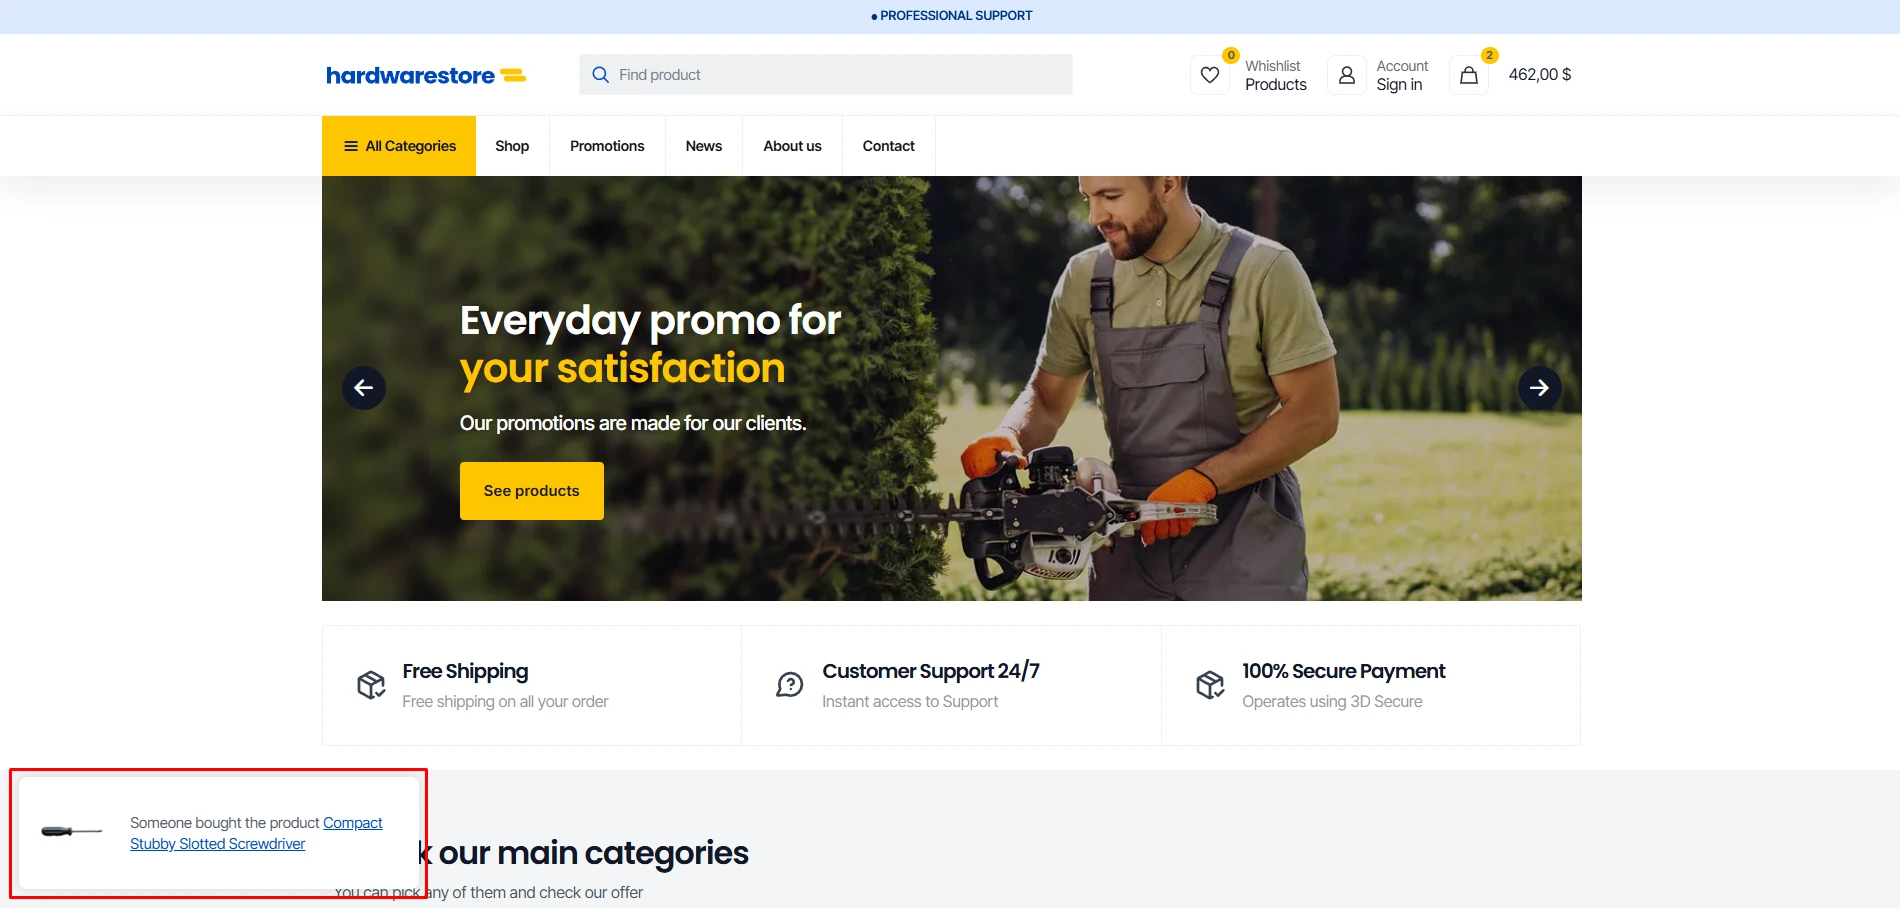
The Sales Pop option (also known as a Fake Sell or Social Proof Notification) consists of those small alerts that pop up in the corner of the screen while a customer is browsing. They usually look something like this: ‘Mark from London just bought: Mechanical Keyboard (2 minutes ago).’
The main goal here is to build Social Proof. These notifications are designed to show potential buyers that your store is buzzing with activity and that other people trust your brand.
3. Shop – Addons Design
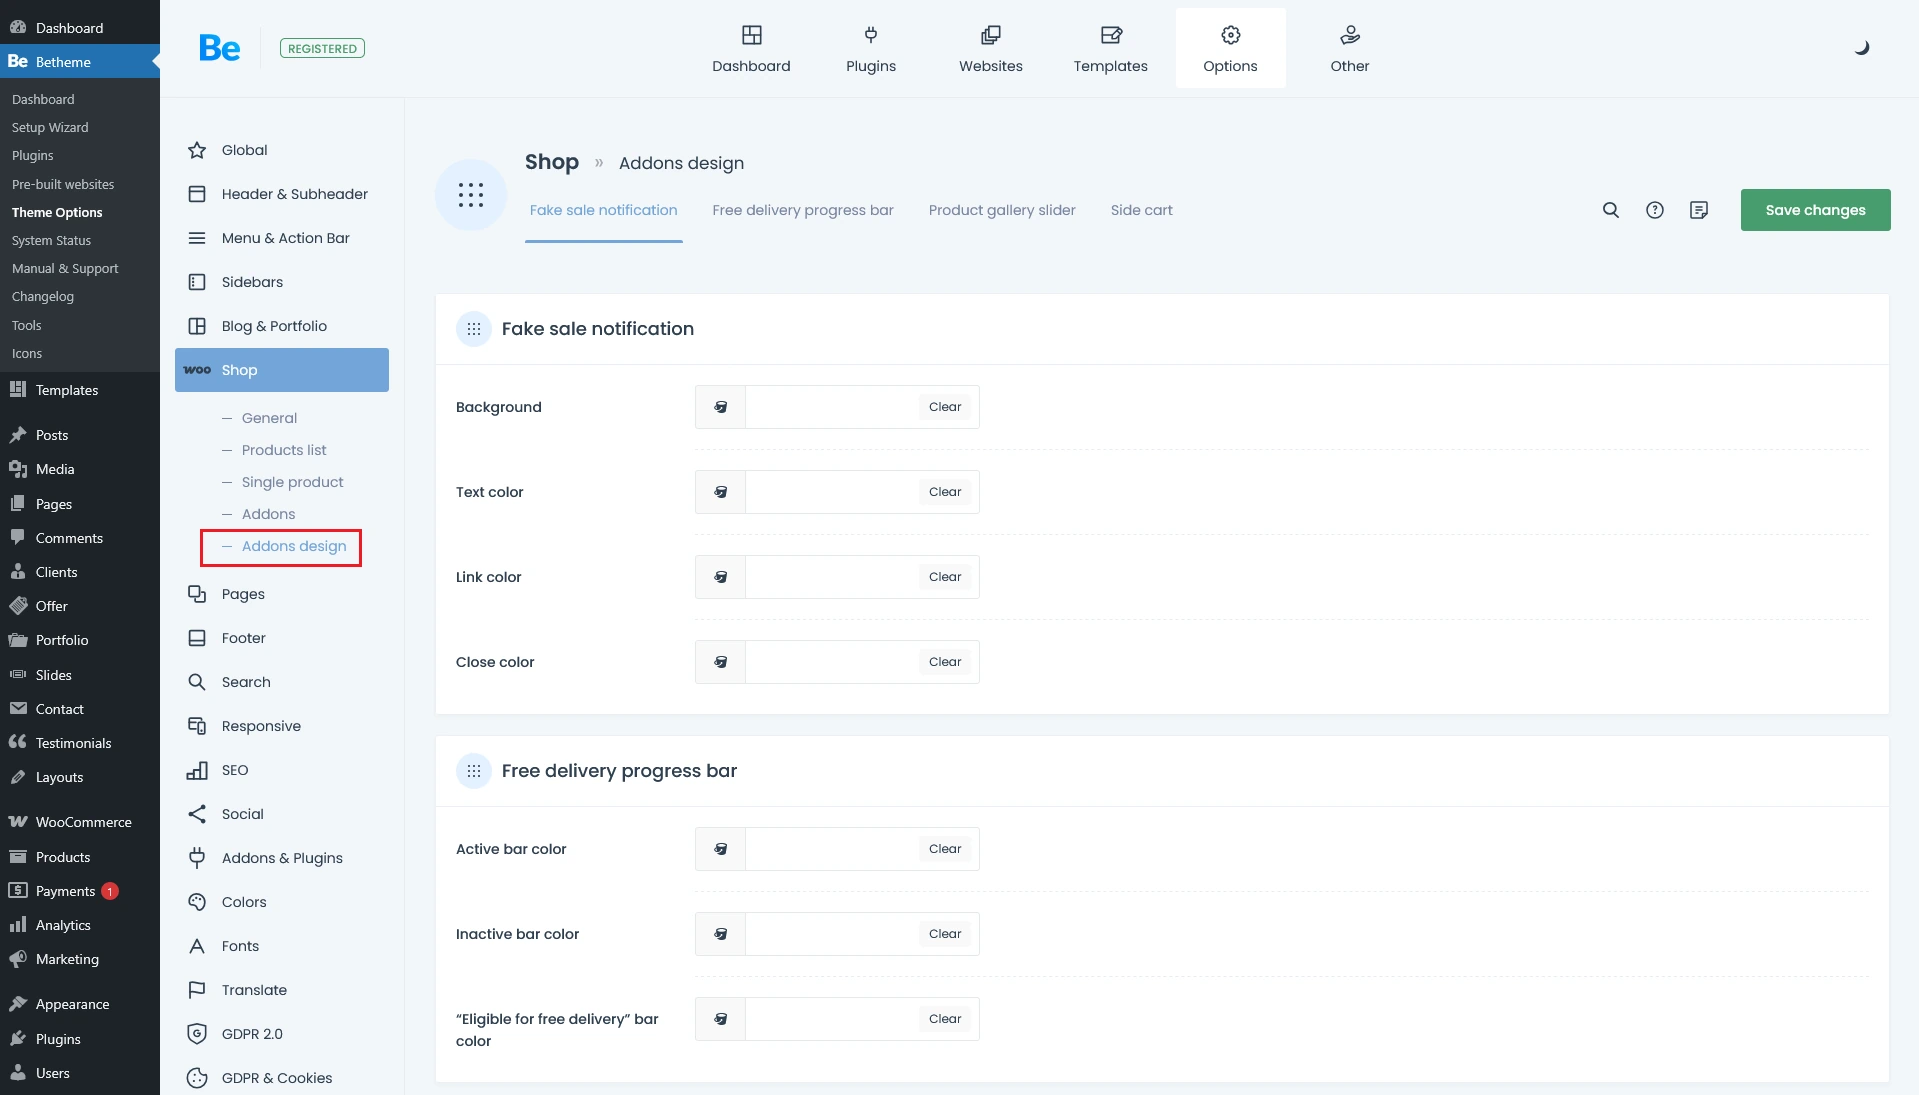
Once you’ve enabled the features from the previous section, head over to the Shop -> Addons Design tab. You’ll find a whole suite of options to customize everything and make it match your store’s branding perfectly. You can tweak the background colors, headers, and text styles—and that’s just the tip of the iceberg. There are plenty of other settings in there as well, so I highly recommend diving in and exploring them on your own!