


The Best Plumber Website Design Examples
January 24, 2024
Modern Chiropractic Website Design Examples
February 6, 2024Fixing the WordPress missing a temporary folder error involves clarity and precision. By addressing core issues such as accessing the wp-config.php file and managing hosting settings, you smooth out the wrinkles in your WordPress installation. Using tools like FTP clients, you can create a stable 'temp' directory. Backed by a working understanding of file permissions and PHP configurations, this corrective process is within reach.
Key takeaways:
- Diagnose Correctly: Identifying server-related problems like PHP version mismatches or directory path errors is crucial.
- Implement Solutions: Mindful updates to configuration files restore functionality without causing collateral issues.
- Secure Your Setup: Regularly backing up WordPress core files ensures readiness against any future hiccups.
You now have a disciplined approach to troubleshooting with strengthened skills for maintaining site performance. The toolkit is complete, providing both understanding and actionable steps.
How to get rid of the WordPress ‘Publishing Failed’ error in version
Try these actions to solve the WordPress ‘Publishing failed’ problem on your site.
- Clear browser history
- Change the permalinks
- Enable CDN
- Change your site’s fastcgi cache folder
- Change on Cloudflare to Full SSL from Flexible SSL
- Use the WordPress plugin - Classic Editor
- Activate debug mode
- Reactivate your plugins
- Turn off HTTPS for all pages of your WordPress blog while you are editing
Badly Designed Cache Plugin
The cause of the issue may be a bad cache plugin. Popular plugins include WP super cache, W3 Total Cache and Autoptimize. These tools clear the cache on your site when changes are made. If the plugin is incorrectly designed, the cache may not be cleared, and your old site will appear.
Try to empty the cache with the plugin settings. If the plugin you have is W3 Total Cache, go to settings and empty cache. This should solve your problem and make the changes visible to users.
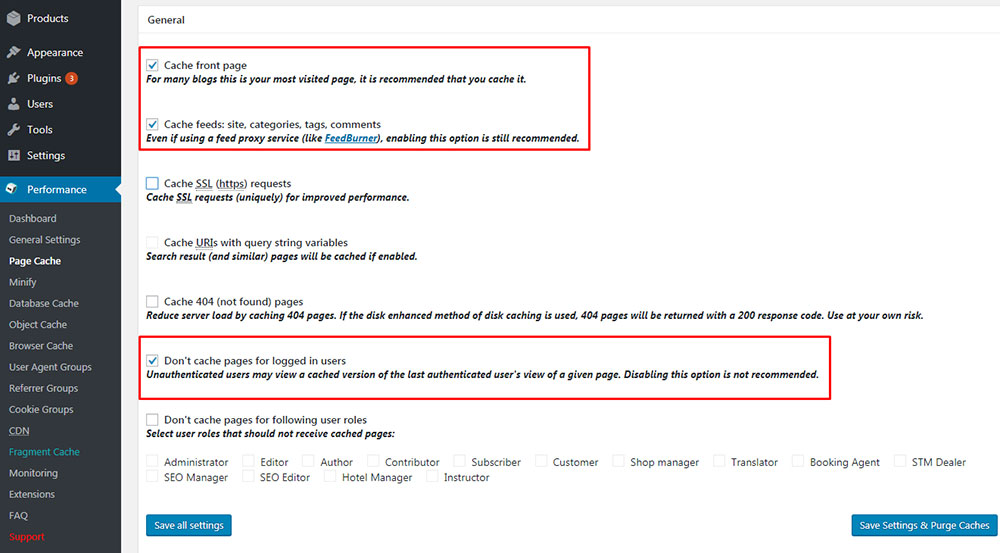
The plugin can also define what needs to be cached. This page cache functionality is available in W3 Total Cache. Under Page Cache, go to the menu where you’ll see a way of not caching the front page. Usually, it will be set to caching the front page and you can untick this.
If these methods aren’t working, you could try turning off your cache plugin. To do this, you just need to deactivate it by heading to Installed Plugins and then click Deactivate on your cache plugin.
CDN Isn’t Enabled
CDN utilizes distributed edge servers to send your content across the globe. When users go to your site, a host server is used to enable access. Even if traffic on the server is high, users still try to access the same host server which slows down your site. CDN assists with its large network. It will cache any permanent content and keep it on a server. If traffic becomes slow, the user can be redirected to this server.
The CDN content may not always update when you make changes to your static content.
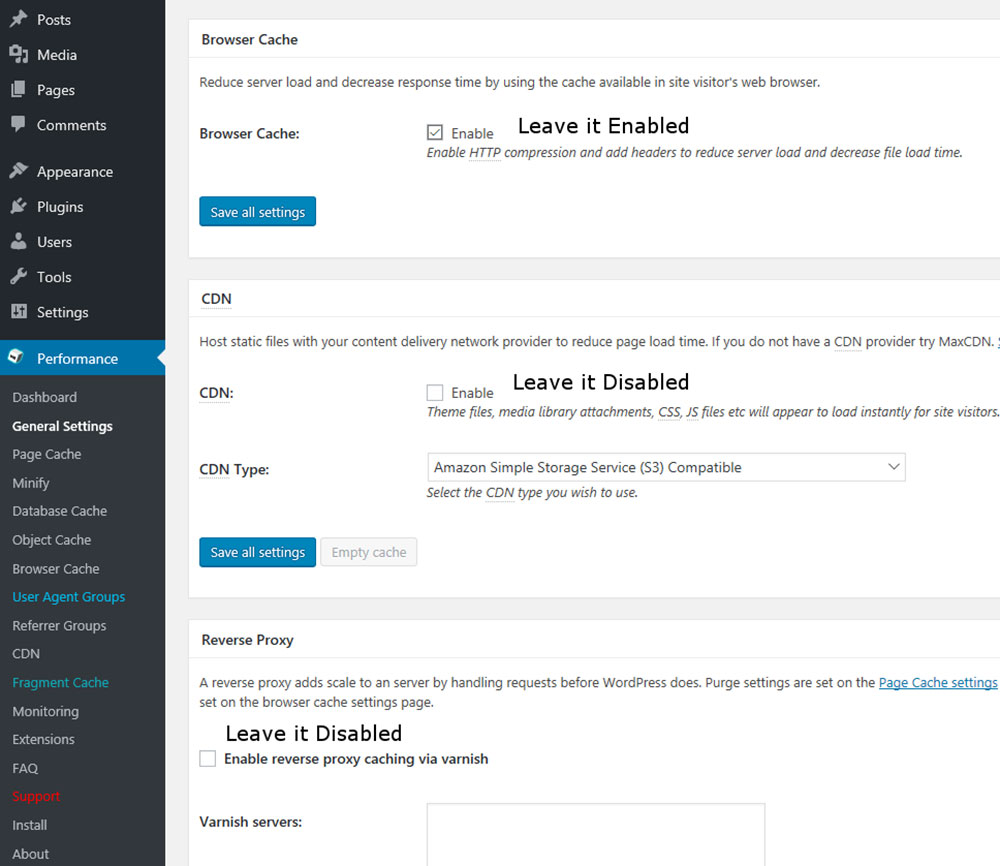
Cache plugins are used to enable CDN. Bypassing the CDN could solve your issue, so you could try disabling it temporarily, by heading to the General Settings of your W3 Total Cache plugin and unticking the CDN option. This should solve your issues so you should be able to see all changes in WordPress as you make them and eliminate the error message.
Manually Rename the Site’s Fastcgi Cache Folder
Nginx uses a different user group on the server rather than the one in the fastcgi cache folder. This can make it a tricky folder in WordPress and cause problems and error messages such as ‘Publishing failed’.
Remove the fastcgi cache folder to solve this issue. When your server next wants to cache something, it will automatically create it in the right place withno need to restart PHP, Nginx, or anything else.
You can find your fastcgi cache folder in an Nginx config file
where it’s defined with a fastcgi_cache_path operator. The command below should help you find exactly where this operator is in your Nginx.
Log into the WordPress server of your site with a root OR with a sudo user. Then run this command:
grep -rnw '/etc/' -e 'fastcgi_cache_path'
The output should look something like this:
/etc/nginx/sites-available/allthings.conf:2:fastcgi_cache_path /var/www/cache/fastcgi levels=1:2 keys_zone=allthings:100m inactive=50m;

/etc/nginx/sites-available/allthings.conf:90:         # Define memory zone for caching. Should match key_zone in fastcgi_cache_path above.

/etc/nginx/sites-available/allthings.conf:208:       # Define memory zone for caching. Should match key_zone in fastcgi_cache_path above.
The above example clearly shows that you’ll find your fastcgi_cache-Path in allthings.conf, an Nginx configuration file. The fastcgi cache folder is then /var/www/cache/fastcgi.
Your fastcgi cache folder won’t be in the same place as in the example given which is only to show you how the output will appear. You’ll need to search for your folder.
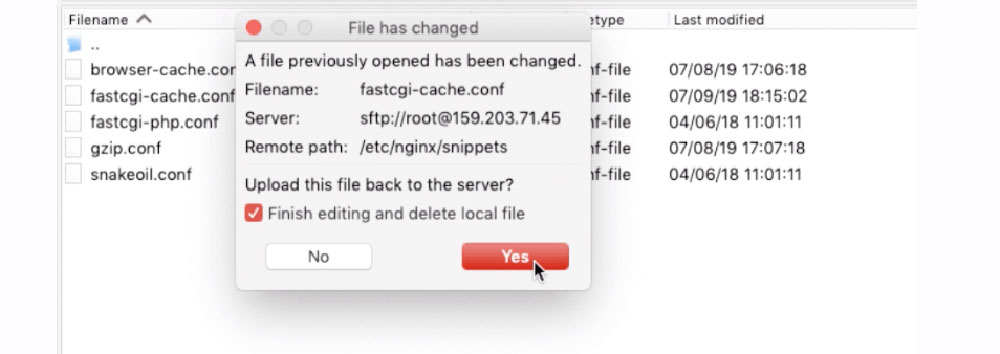
Renaming your fastcgi cache folder:
When you find your fastcgi cache folder on the Nginx server, you can rename it by running this command.l. Then Nginx will recreate it automatically with the right permissions.
sudo mv /path/to/cache/fastcgi /path/to/cache/fastcgi.old
In the code above edit ‘/path/to/cache/fastcgi’ to be the location of your fastcgi cache folder that you found in the previous step.
Once you’ve run the command above, your folder will be renamed and will have a .old extension.
The Cause is Gutenberg Editor
To solve the problem of the WordPress ‘Publishing failed’ error, go back to the original WordPress editor rather than returning to an old WordPress version. Try this if you’ve been using the new Gutenberg editor instead of the usual WordPress editor.
Simply deactivate the Gutenberg editor. This should solve your error message problem and get your page back to normal.
How do you disable Gutenberg?
- First, you’ll need to install the plugin Classic Editor
- Activate Classic Editor
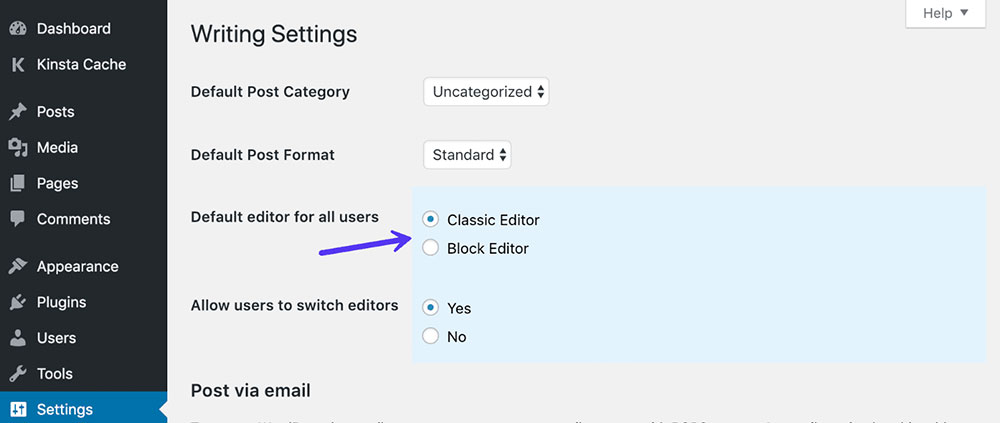
This will cause your WordPress to go back to using Classic Editor rather than Gutenberg. You can now resume publishing or editing your posts and pages as normal. If you’ve downloaded the plugin but can’t see Classic Editor, you’ll need to go to your settings, then go to writing and tick Classic Editor as the default editor.
Reactivate Your Plugins
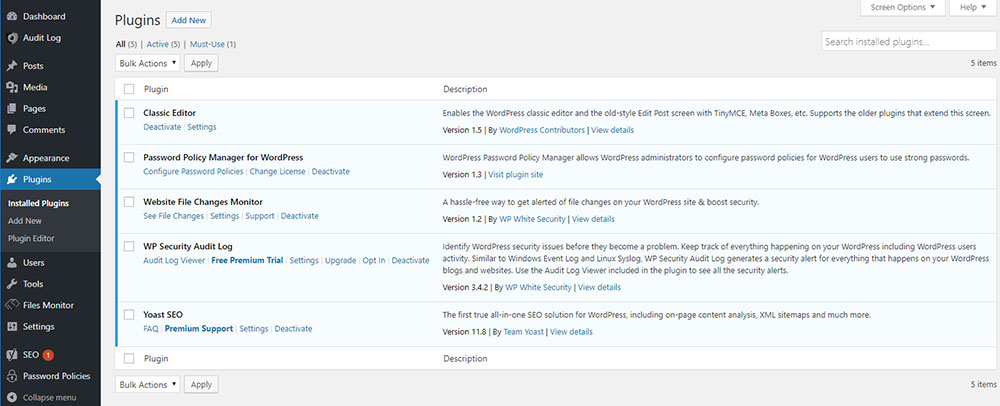
One of the first methods to try to resolve your ‘Publishing failed’ WordPress error is reactivating your plugins by deactivating all of your site’s plugins. Then you can test and reactivate them one by one.
Turn on Debug Mode
If your WordPress post failed to publish, another solution is to activate debug mode, which may help you find out the cause.
define('WP_DEBUG', true);
If you want to turn it off again, just take out the code or you can change “true” to “false” in the code.
define('WP_DEBUG', false);</li>
Deactivate HTTPS
HTTPS may be causing the failure of your WordPress updating. In this case, follow these steps to resolve the error:
- Turn off the automatic HTTPS redirect (You can turn it back on after you publish successfully).
- Click save.
- Open up the WordPress Page with an HTTP connection (http://website.com/wp-admin)
- Save it and try to publish a page or post.
- Enable HTTPS again.
Change the Permalinks
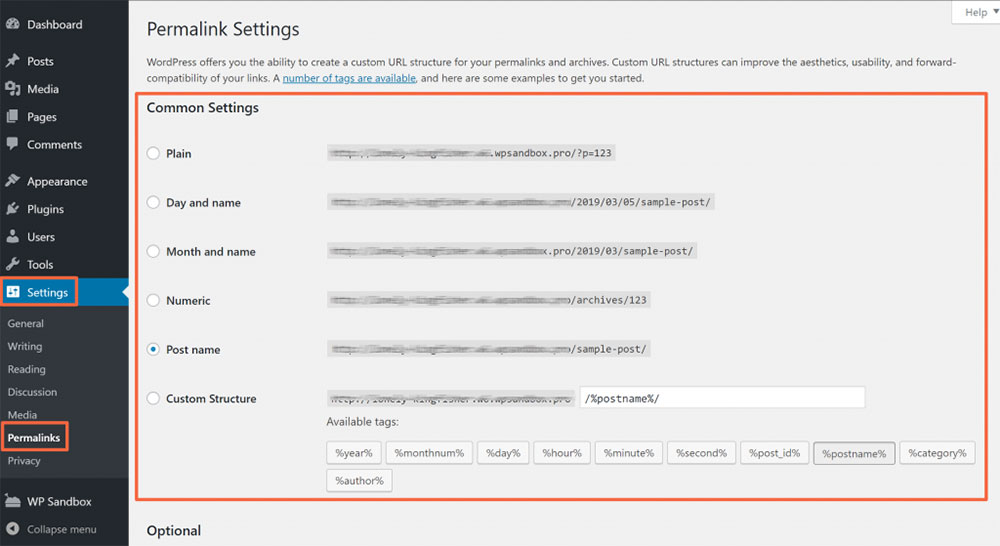
If the WordPress updating failed error appears and you are unable to publish, try this quick fix:
- Click Settings and then Permalinks
- Once on the “Permalinks Settings” page, don’t edit anything just click “Save changes”
This simple action can cause WordPress to change and fix the .htaccess file. Navigate to the editor, change something and click “Save draft”, which may successfully remove the error.
Change to Full SSL from Flexible SSL on Cloudflare
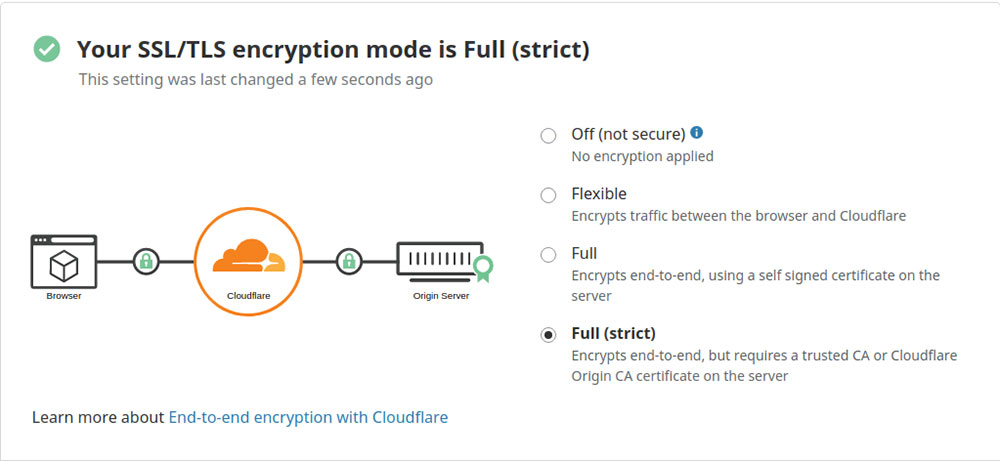
If your WordPress update failed and you use Cloudflare, you can try switching to “Full SSL” in the SSL/ TLS settings> Overview tab.
FAQ on Fixing the WordPress missing a temporary folder
Why is WordPress showing the publishing failed error?
This error often appears due to conflicts with plugins, a poor Internet connectivity, or server issues. You could also encounter issues with the WordPress environment, including outdated themes or PHP versions. It needs a quick fix to ensure your site functions smoothly and your posts go live.
How can I troubleshoot plugin conflicts?
To identify the culprit, deactivate all plugins and reactivate them one by one. Often, a rogue plugin causes problems with WordPress's publishing. Consider using the WordPress debug mode to reveal any errors the plugin might cause. This helps pinpoint exactly what needs fixing.
What role does the server play in this error?
Your server might limit resources, causing Memory limit issues. Or, sometimes, it might reject requests due to Security settings. Review your PHP settings and ensure all server configurations are suitable for your WordPress CMS. Talk to your hosting provider to get everything aligned.
How do I check server settings?
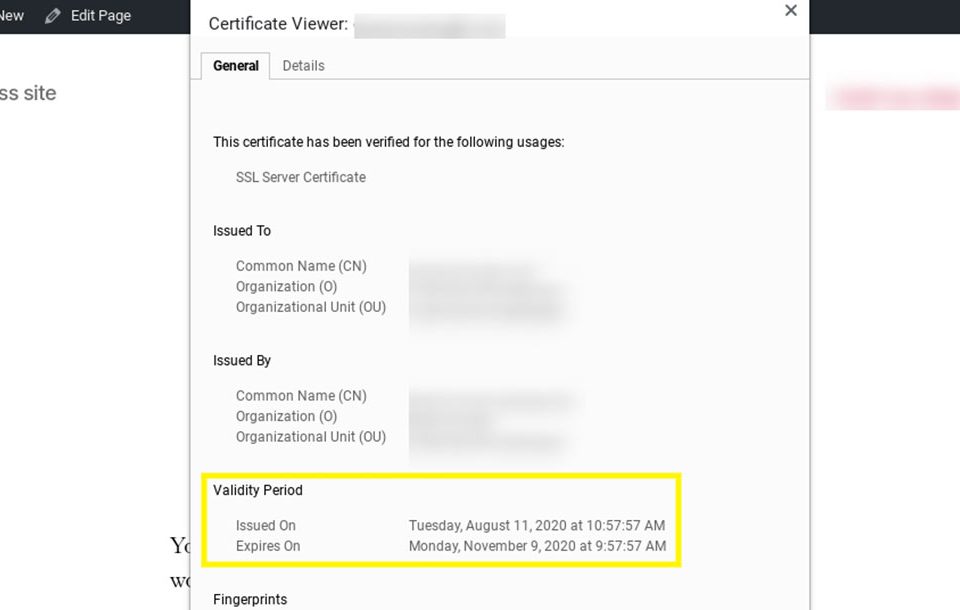
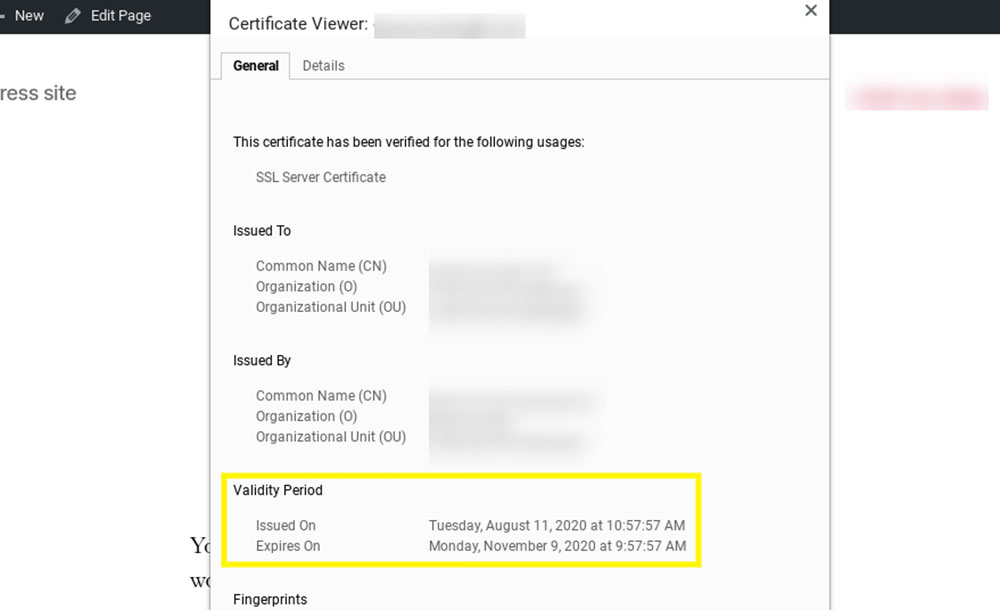
Access your cPanel or use an FTP client to view server settings. Make sure the PHP version is up to date, and confirm SSL certificates are valid. Consider updating your server's software or checking the hosting plan with your provider for any API issues.
Can outdated themes cause publishing errors?
Absolutely. Theme compatibility is crucial. An outdated theme may not support the latest WordPress updates, causing glitches. Always check for updates in your WordPress dashboard and ensure compatibility with current WordPress versions for smooth site performance.
How can error logs help in diagnosing the problem?
Error logs show detailed reports of what's going wrong. Access them through your hosting panel or WordPress's backend. Analyze the logs to find recurring errors, which often indicate what's breaking your publishing flow. They’re essential for quick fixes and efficient troubleshooting.
Is my PHP version affecting WordPress publishing?
Yes, running older PHP can trigger errors. Ensure your server is using a supported PHP version for better stability and security. Most plugins and themes require current PHP, so updating it is crucial for your WordPress's seamless function.
What can I do if the publishing error persists despite troubleshooting?
If problems persist, consider reinstalling WordPress. Save your content and databases first. You might also switch to the default Gutenberg editor to see if it's an editor-specific issue. Consulting a WordPress professional can also get things back on track.
How can I ensure this error doesn’t happen again?
Regular updates and maintenance are key. Keep plugins, themes, and WordPress core up to date. Opt for reliable hosting, use a Content Delivery Network (CDN), and monitor your site with tools like Google Search Console to catch issues early on, before they become problematic.
Does the admin role matter when fixing this error?
Yes, admin rights provide full access to troubleshoot plugins, themes, and settings. Without it, some fixes might be inaccessible. Ensure your account has adequate permissions, or request help from someone with admin rights to cover all troubleshooting bases.
Conclusion
Solving how to fix the WordPress publishing failed error involves tackling multiple angles. From reassessing server settings to scrutinizing potential plugin conflicts, every step helps you regain control over your WordPress site.
Remember, keeping themes and PHP versions updated can prevent unexpected glitches. Checking your internet connectivity might seem basic, but it’s a common oversight when addressing this issue. If you've followed all troubleshooting steps and still face trouble, consulting a professional might be worthwhile, especially if SQL database connections or advanced coding adjustments are needed.
The goal is clear: ensure your content management system functions smoothly, allowing you to share your updates without interruptions. Armed with these insights, you're ready to ensure your site remains active and engaging. Let this be your guide to overcoming publishing obstacles effectively. Adjust, adapt, and watch your site function as it should, back in action, serving your audience seamlessly.
If you enjoyed reading this article on how to fix the WordPress publishing failed, you should check out this one about how to fix the WordPress missing a temporary folder.
We also wrote about a few related subjects like jQuery is not defined, cannot login to WordPress, fixing the defer parsing of JavaScript, WordPress stuck in maintenance mode, WordPress sorry, you are not allowed to access this page and how to fix the http error when uploading images to WordPress.


