


How to install Google Tag Manager on WordPress
March 27, 2020
The best restaurant websites with gorgeous web design
April 15, 2020WordPress updates should improve your experience and help you work more efficiently. However, sometimes errors do appear, including the “WordPress updating failed” error, which doesn’t let you edit or create posts. This article will help you solve this problem.
The source of the problem can either be the code or an outdated incompatible plugin so the solutions are different. For example, what worked perfectly with the WordPress 4.x and the Classic Version may not function for the Block Editor.
IMPORTANT! Before performing any action to your article/page/code, save it as a backup. WordPress never saves your content and an unexpected error could delete it all.
Why is this happening?
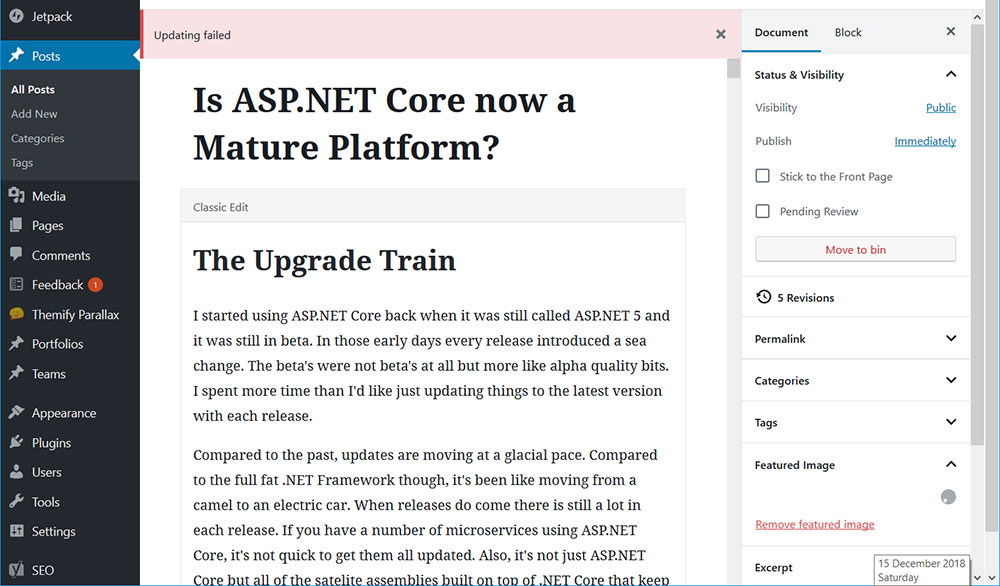
Users experienced this problem when they updated to WordPress version 5. If you had the 5.0, 5.1, 5.2 versions, you could not edit old posts and creating new posts was also impossible because of the WordPress updating failed error.
It was clear that the problem was in something new included in the 5th version. WordPress discovered incompatibilities within its Gutenberg editor due to a contracted page builder.
There is a solution which works for some websites, but won’t work for all. It is worth trying, after making a backup file with all your data, it’s possible that you’ll even manage to solve the problem on your own.
Follow these steps to solve the WordPress updating failed error:
Install the Classic Editor - WordPress plugin
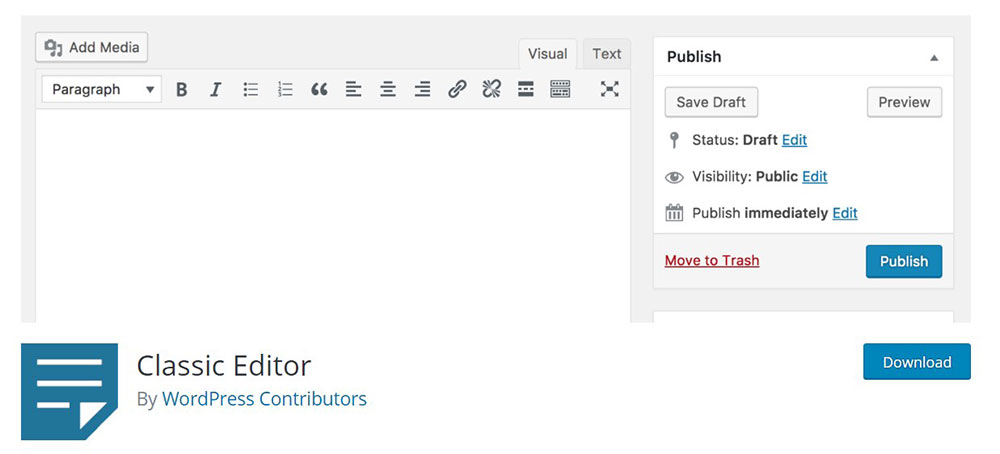
When a new version is not working for you, the simplest and smartest solution is to return to the old one. This is the preferred solution if you don’t want to meddle with the code as this does not require technical skills. Since the launch of Gutenberg, more than 1 million people have solved the problem this way.
Simply download and activate the Classic Editor plugin instead of the Gutenberg Editor, by following these simple steps.
- Log into your WordPress administrator account.
- Try to post something new or to edit old content to check for the error. If it still appears, it’s time to change the editor.
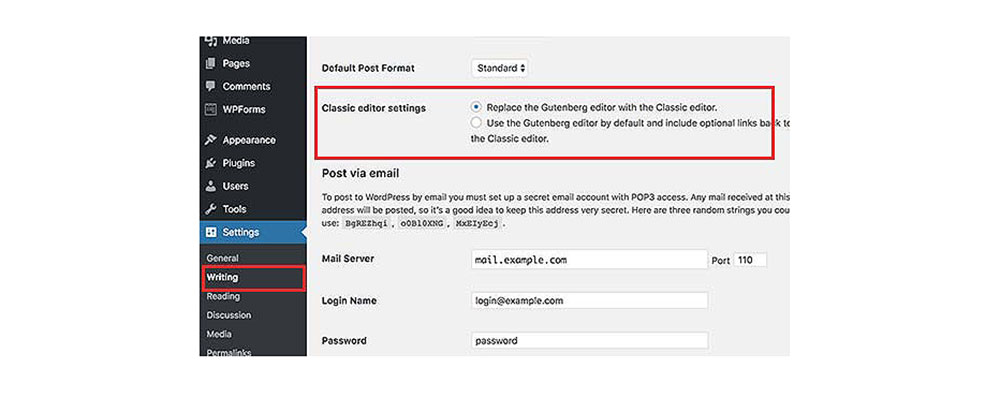
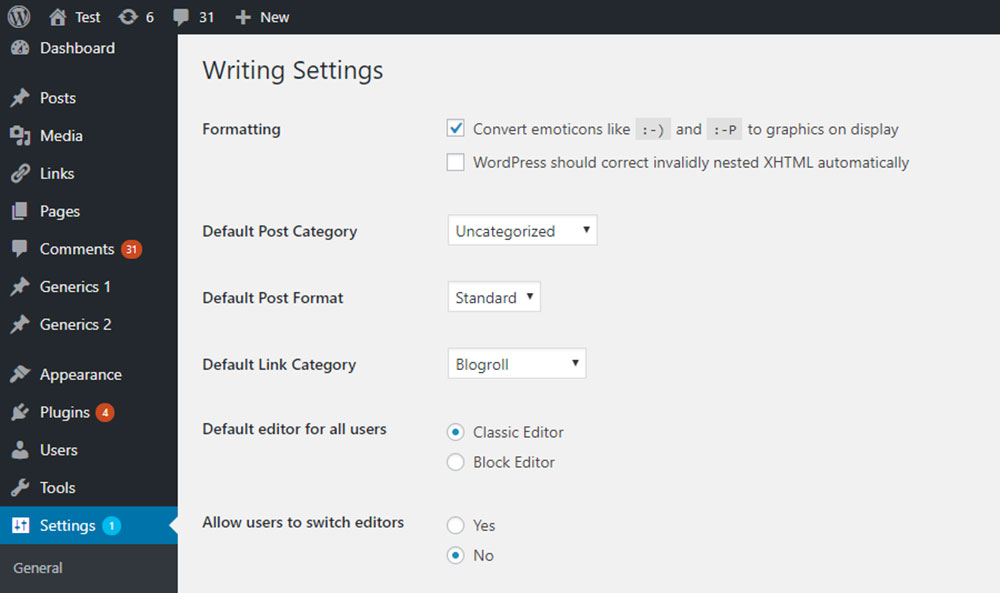
- Go to Settings – Writings
- Choose the “Classic Editor” option.
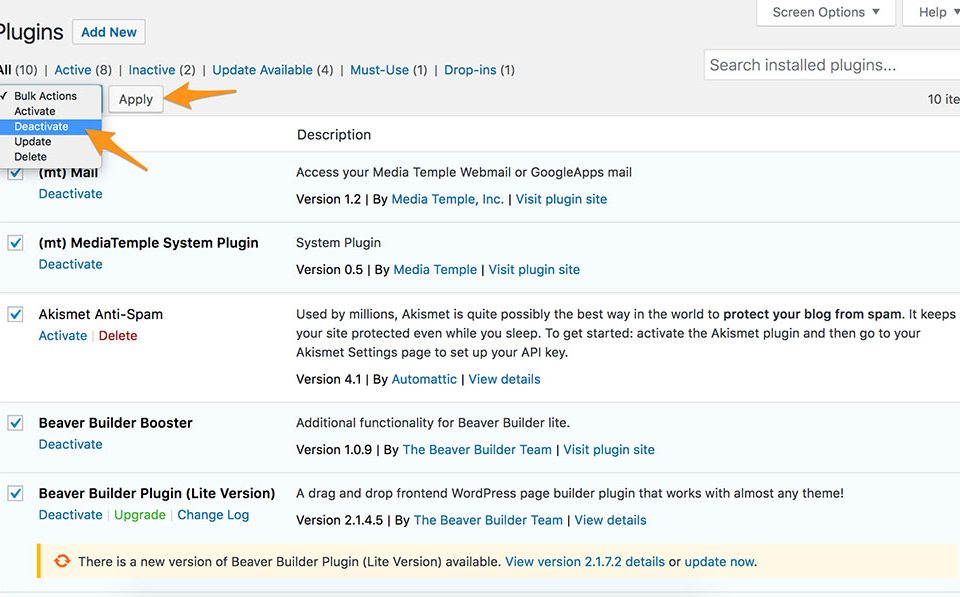
In some cases, this last option won’t appear, which means you have to download and activate the editor with these additional steps:
- Click on the “Plugin” menu on the left side of your WordPress main page
- “Add new” plugin
- Find the Classic Editor in the opened window
- Download and install it
- Activate it
- Return to Settings – Writings and choose the Classic Editor.
It’s important for all users to set this editor to avoid additional problems. After this, you should be able to make new posts and edit the existing ones.
Use this solution if the above doesn’t work: clear cache, delete cookies and login again.
At times, restarting some account and browser features may be very useful. WordPress sets some variables every time you log in, so there is a high possibility they may cause the error. To properly reset them and the security strings you have to restart the login process.
Use the following steps:
- Clear the cache in WordPress (if applicable)
- Log out from your WordPress account
- Clear the cache in your browser. (If you need the cache, try solving the matter without performing this step. However, it might not work without clearing cache)
- Log in. Check if the error still appears.
This method should work for the WordPress “updating failed” error. These steps can also solve other problems, such as the errors “Custom Taxonomies Not Showing” and the “Categories not working”.
Try debugging in WordPress
Activating debug mode is a third possible solution which will help identify the cause of the problem inside the code. Make sure you have FTP permissions and use the following string to activate this mode:
define('WP_DEBUG', true);
If this solved the problem using coding, afterwards remember to deactivate the Debug Mode by using one of the methods below:
- Remove the string you introduced early
- Replace “true” with “false” in the following way:
define('WP_DEBUG', false);
If these instructions aren’t enough, search for a more informative video on Activating Debug Mode and follow it.
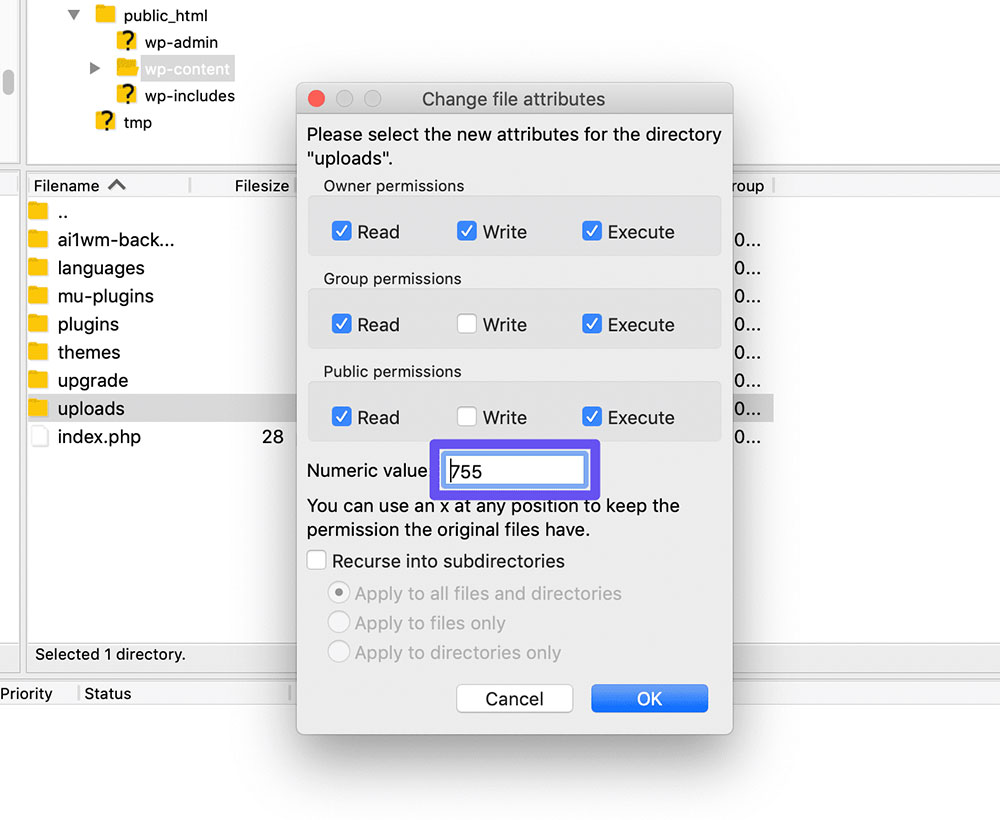
Change permissions and enable auto-update
This error is common if you don’t synchronize the auto-update on all your files, plugins and software If you want to automate the whole process, you may need to change some file permissions.
Troubleshooting advises that in case a WordPress update fails: “Make sure that your entire WordPress directory is owned by the username under which your Apache server runs”.
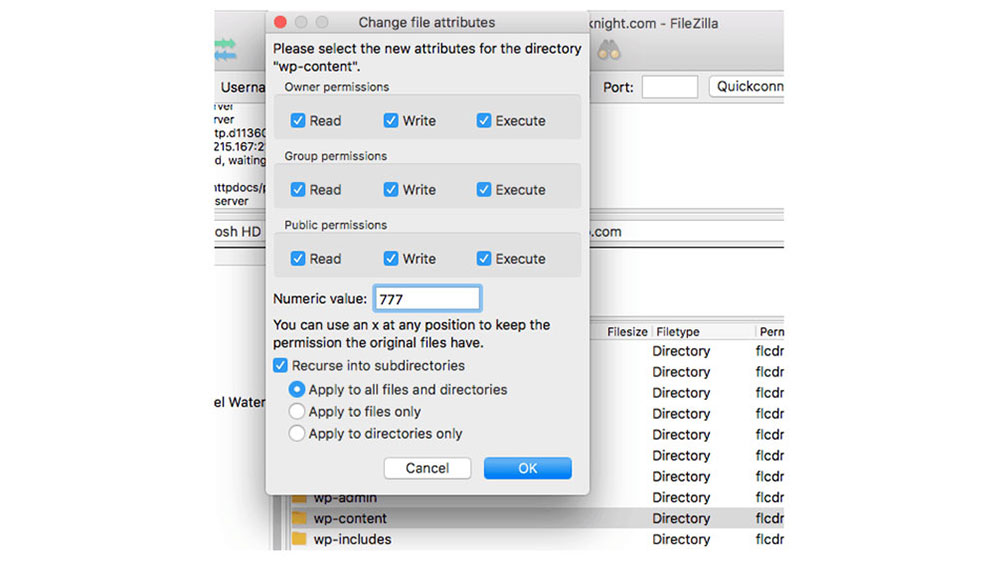
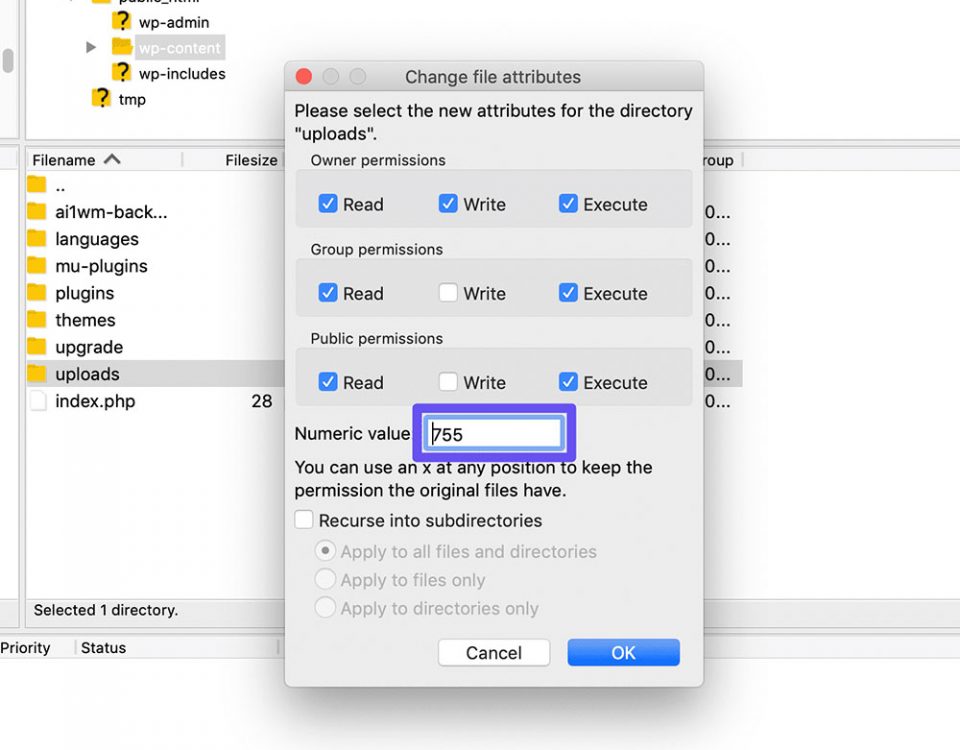
Try changing permissions on the “Upgrade” directory, because the system uses this directory as a temporary location for the new WordPress file. Therefore, the server must have permission to write in this directory.
Set the permissions to 777 or CHMOD and then restart the updating process. However, remember to keep the permission as restrictive as possible.
This solution might require some further research and several trials, but it’s worth it. The system automatically downloads the updates in a smooth process.
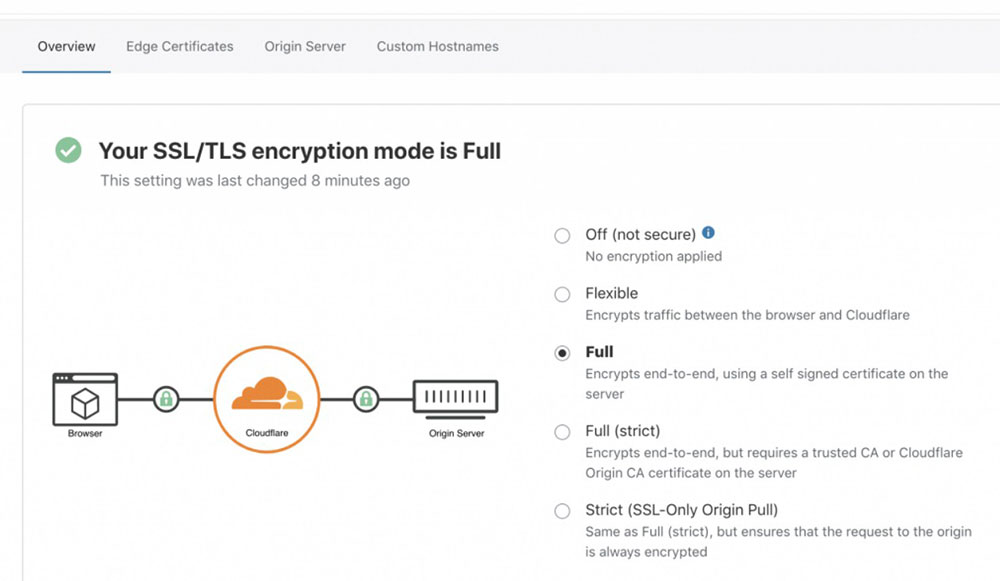
ReplaceFlexible SSL with Full SSL on Cloudflare
On Cloudflare, a trustworthy solution is opting for Full SSL mode. You can find this function in the Overview tab section of the SSL/TLS Settings menu.
Turn Off Safe Mode
The Safe Mode is also a possible cause of the“updating failed” error, because sometimes it doesn’t allow the auto-updating system to work. Therefore, it’s considered obsolete as of PHP version 5.3.0.
Some ways to disable it are:
- Use the server control panel to disable the Safe Mode.
- Insert the following code snippet:
safe_mode = Off
Use this snippet in your Apache configuration. Restart the Apache soft after inserting it in the httpd.conf file.
<Directory /var/www/public>
php_admin_flagsafe_mode off
</Directory>
Reset Permalink Structure to Default
If you reset permalink structure to default configurations, you can fix the WordPress updating failed error.
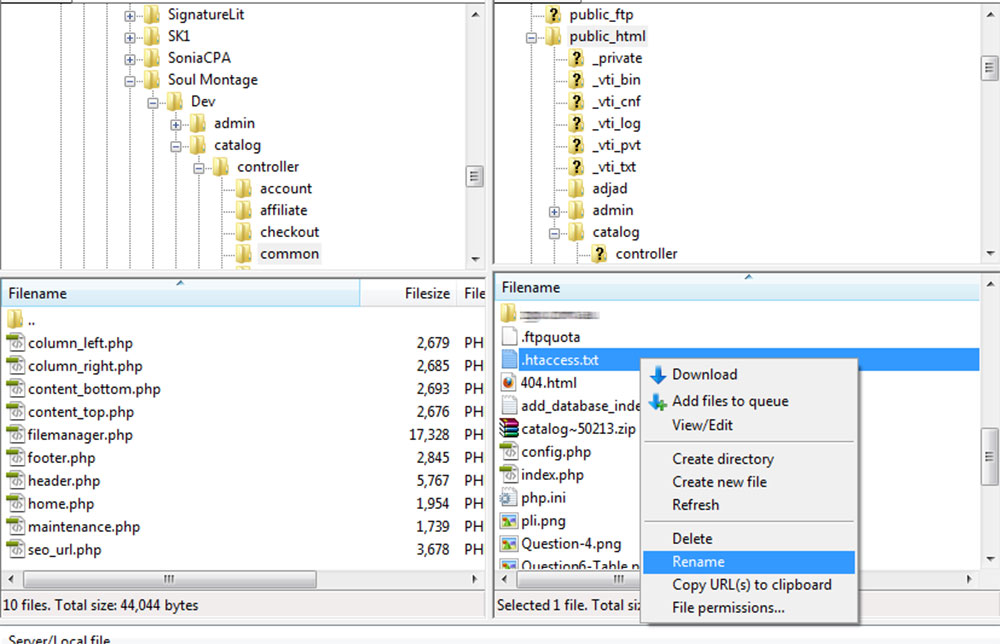
The .htaccess file issue remains so you should either delete it or change its name to .htaccessbkup.
If this helped you solve the problem, this means the server interferes with the WordPress features operations. Contact your host and find out the cause of this problem to avoid it in the future.
Check the settings of a Security Plugin

An activated security plugin might also be the cause of the error. One of its duties and features is to block any strange or questionable action, based on the IP of the device used. If this is the case, you need to whitelist your IP address in the plugin settings.
Also, check for this plugin to change the settings of your website to SSL instead of HTTPS.
Turn Off HTTPS For All Pages Of Your WordPress Blog (Not Recommended)

One of the above-recommended solutions should be effective. However, if not, this last solution is possible although a little risky.
Try disabling HTTPS for all pages of your blog, however although it may solve the problem, it can create other problems, for example, your website isn’t protected while the HTTPS is turned off.
This action has been tested on Cloudflare through Page Rules or General Settings. For the latter, access the SSL/TLS menu and click on the Edge Certificates section. Find and choose the “Always use HTTPS” option.
Here are 10 ways to solve the WordPress updating failed error for many types of websites and configurations.
If you enjoyed reading this article about WordPress updating failed error, you should read these as well:


