

How to downgrade WordPress (Easy to follow guide)
March 23, 2020
How to install Google Tag Manager on WordPress
March 27, 2020The error, the link you followed has expired, can prevent you from trying out a new theme, installing a plugin, or uploading a file.
When you are trying to get a document published a series of error messages can appear; Sorry, document preview session has expired. Then WordPress theme upload error. It’s important to know why these errors occur and what to do about them.
In short, the link you followed has expired will appear when you attempt to upload themes, install plugins or attach documents that are too big, or they’re taking too much time. They exceed the WordPress default upload limits.
WordPress takes this measure to keep your website safe and its performance optimal.

There are ways to work around these error messages without harming your site. WordPress will keep it safe. You need to increase the default upload limits.
There are three different effective solutions to prevent the “link you followed has expired” from appearing on your WordPress dashboard.
The Link You Followed Has Expired. Why? 3 possible reasons
Reason #1
Your hosting service providers restrict the size of files you may upload and your file exceeds the limit.
A memory exhausted error and memory execution time exceeded error will appear. For themes and plugins, the link you followed has expired error will appear because the upload size is limited by default.
Reason #2
You can upload up to 100mb at a time with managed WordPress hosting providers
A smaller shared hosting plan will not allow you to upload larger themes and plugins within your WordPress admin area. Your scripts will run too long and will get aborted. In this case, only your web hosting provider can increase the upload limit.
Reason #3
Your website limits the execution time

Regardless of the size limit, when the script runs for too long the memory exhausted or maximum execution time exceeded error will appear.
Strategy for countering the link you followed has expired
Armed with this knowledge you now want to upload a WordPress theme or plugin without triggering the link expired error and fix the link you followed has expired:
3 Solutions
If the first solution does not work, undo the changes you made to the core files and try the second or third method.
Before you start, It’s important to back up your site, and store copies of your files.
Solution 1: Add code to your functions.php file
This is the easiest but most restricted action. Restricted because the changes you will make are connected with your present WordPress theme. You will have to redo this procedure when changing the theme, so if you change your themes frequently, the other two solutions will work better.
- Go to root directory>>wp_content>>themes
- Open functions.php file of your present theme
- Add the following code to your WordPress theme’s functions.php file. Don’t set the limits too high or you will open the door for hackers or bugs that slow down the script process and bring your site to a standstill!
@ini_set( 'upload_max_size' , '120M' );
@ini_set( 'post_max_size', '120M');
@ini_set( 'max_execution_time', '300' );
- Save the changes
2. Edit the .htaccess file to increase the upload limit
You will add or remove details from the core files of WordPress, using the CPanel.
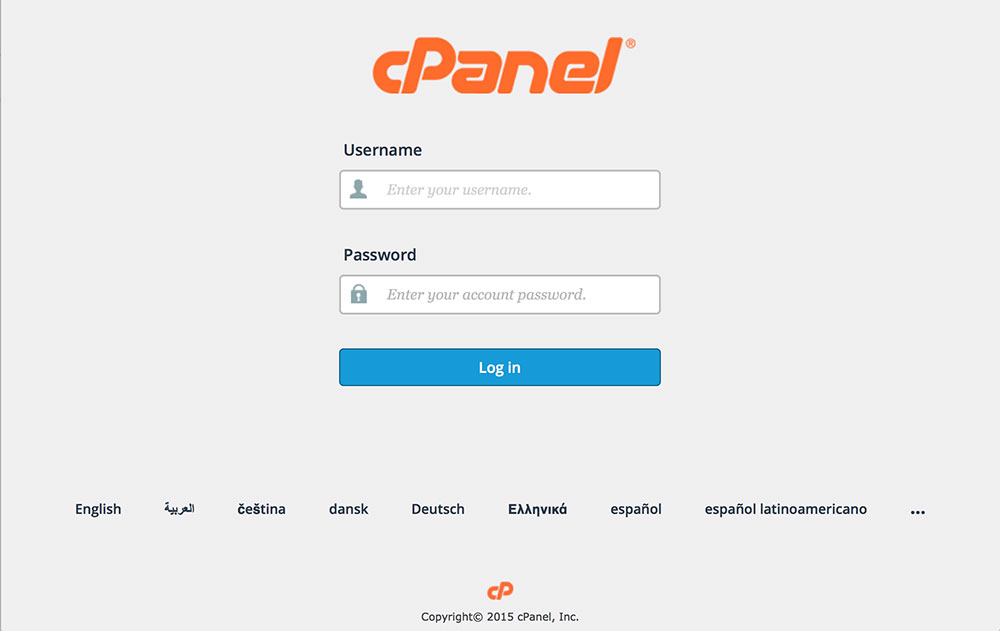
- First,login to the CPanel (type yourwebsite.com/cpanel).
To log in, use the CPanel username and password that you’ll find in the welcome email from your hosting provider.
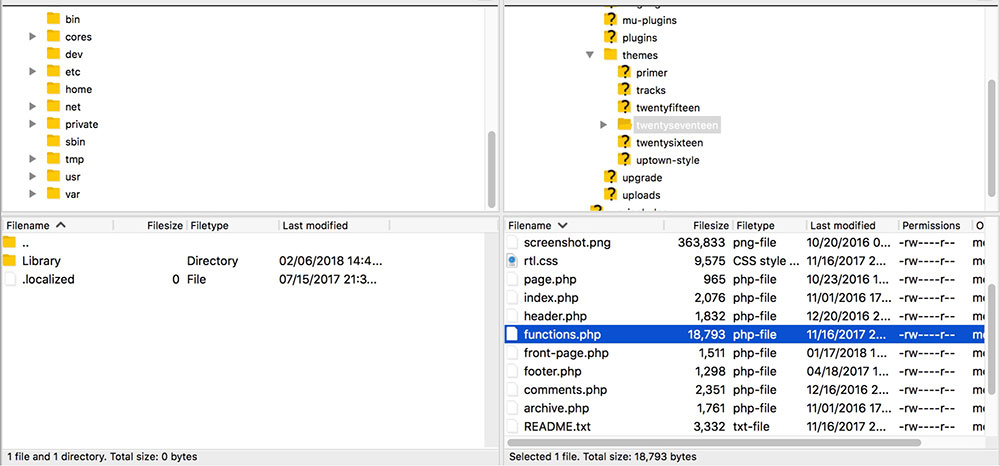
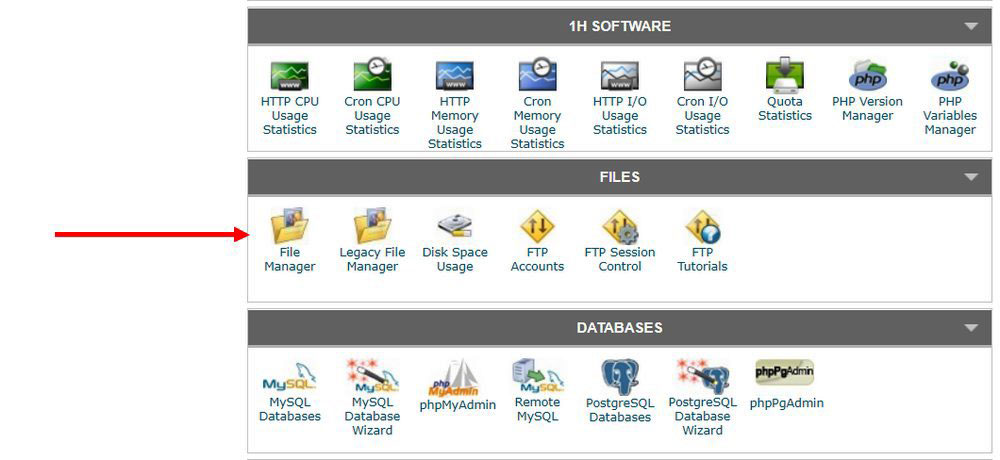
- Find and open File Manager
Open the File Manager app and select the public.html folder.
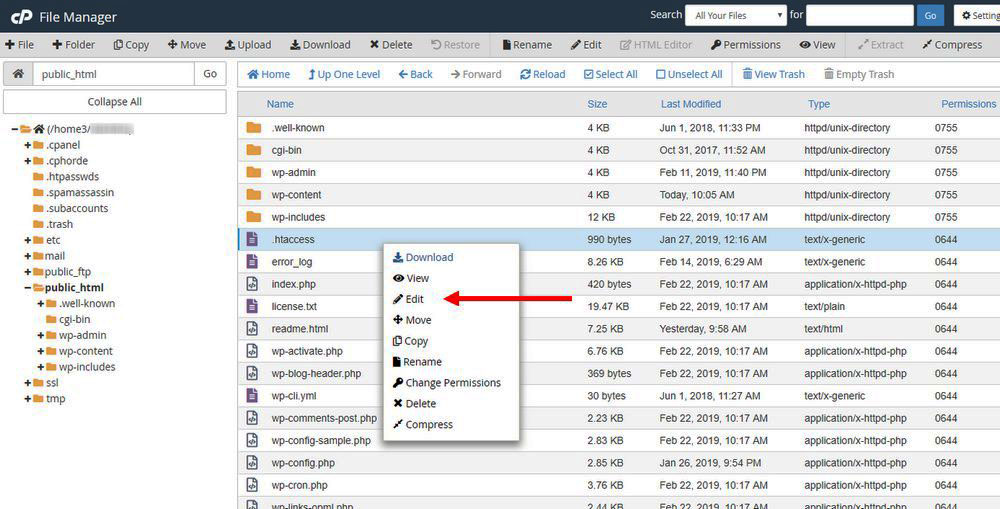
- Copy and paste this code
Right-click on the .htaccess file and select Edit. Go to the bottom of your .htaccess file and paste this code:
php_value upload_max_filesize 128M
php_value post_max_size 128M
php_value max_execution_time 300
php_value max_input_time 300
- Click Save
3. Create a PHP.ini file
The .htaccess file may be hidden by your file management software or sometimes it doesn’t exist yet because a file permissions issue stopped your WordPress site from generating one. You can manually create the .htaccess file including the necessary code.
If you are using a dedicated WordPress hosting plan, it’s preferable to edit the PHP.ini file instead. Access your WordPress site’s root folder then use FTP or the File Manager app in your hosting account’s CPanel dashboard.
The PHP.ini file probably won’t exist if you are using a shared hosting package. You can check this in your public.html folder.
If you can’t find the PHP.ini file
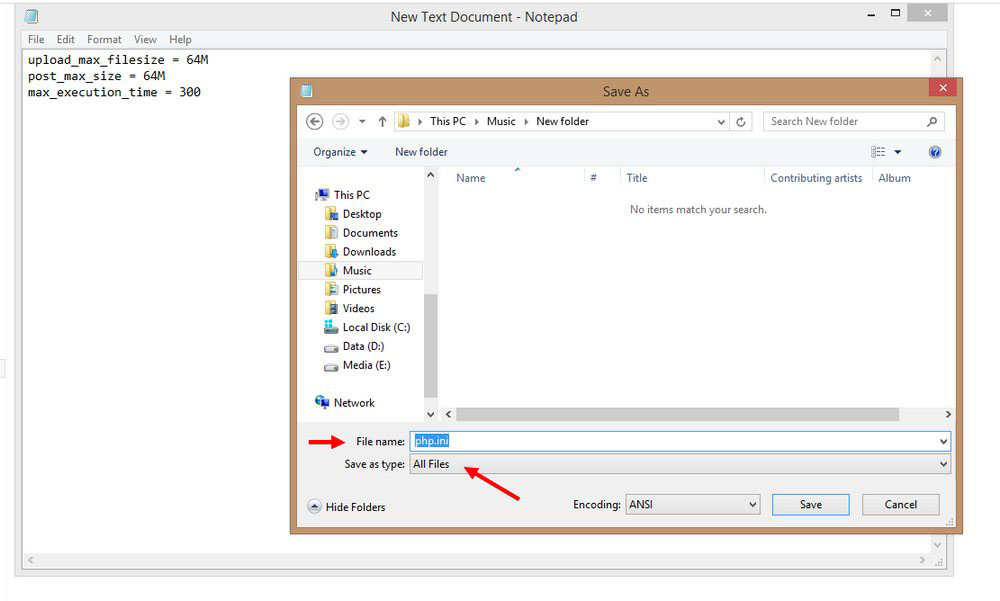
- Create a blank ini file on your computer, before uploading the new file to your server
- On a blank Notepad paste this code:
upload_max_filesize = 128M
post_max_size = 12M
max_execution_time = 300
- Save the Notepad file as ini and choose “All Files”
- Upload the file: access the html folder on your server and upload the PHP.ini file
Ending thoughts on how to fix the link you followed has expired issue
WordPress is the most popular website builder around, and is safer than smaller competitors. To keep you protected from malicious attacks, WordPress prefers to be over-protective so the error, the link you followed has expired will appear if necessary.
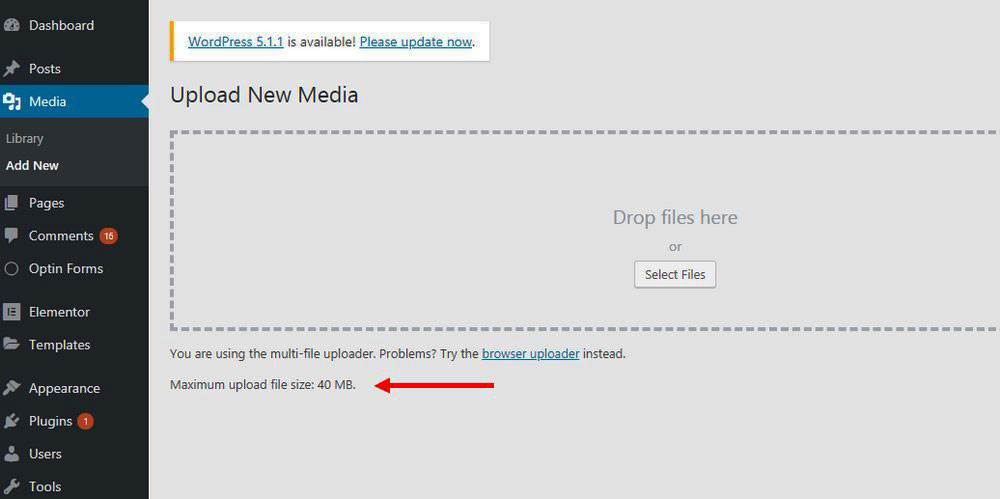
Check the maximum file upload size limit on beforehand by going to Media » Add New page so you know what to expect.
You can expect to have trouble uploading when:
- The error occurs when your upload exceeds WordPress’s default limit
- If you are using a smaller shared hosting plan, uploading larger themes and plugins will be a problem
- When scripts run for too long, they will exceed the maximum allowed execution time
These 3 methods will fix the problem:
- Add code to your php file
- Edit the .htaccess file to increase the upload limit
- Create a ini file
It’s quite easy to fix the link you followed has expired error in WordPress. Then you will be able to upload large files, themes, and plugins through the WordPress dashboard.
Remember that if you are on a shared hosting package, you need to contact your web hosting provider to increase the limit for you.
If you enjoyed reading this article on how to fix the link you followed has expired, you should check out this one about how to fix the currently unable to handle this request error.
We also wrote about a few related subjects like fixing sorry, this file type is not permitted for security reasons, WordPress missed schedule, how to fix the parse error syntax error unexpected, WordPress failed to import media, how to fix the WordPress parse error and how to fix an error occurred while processing this directive.


