

Contact Form 7 not Sending Emails? Here’s How to Fix It
December 23, 2019
Cannot Login to WordPress? Here’s How to Fix this Issue
January 4, 2020A great way to speed up your WordPress is to add expires headers to the configuration of your .htaccess file. What expires headers do is let your browser to cache the content on your website and put a time limit of when that content is requested. Only after the time expires will the website request the content. It is a very effective technique for making your website load faster. The reason behind this is that when browsers use cache, the number of HTTP requests will lower, allowing the website to load faster.
The expires header communicates to the web client that it can use the content on your website, or a certain component of it, until a certain amount of time expires. You can set this amount of time with expires headers. When you add expires headers, it will significantly reduce the number of HTTP requests made from the server, which will consequently massively decrease loading times on your website. With this easy to follow guide, you can add expires headers quickly and easily.
What are Expires Headers and Why are They Important?
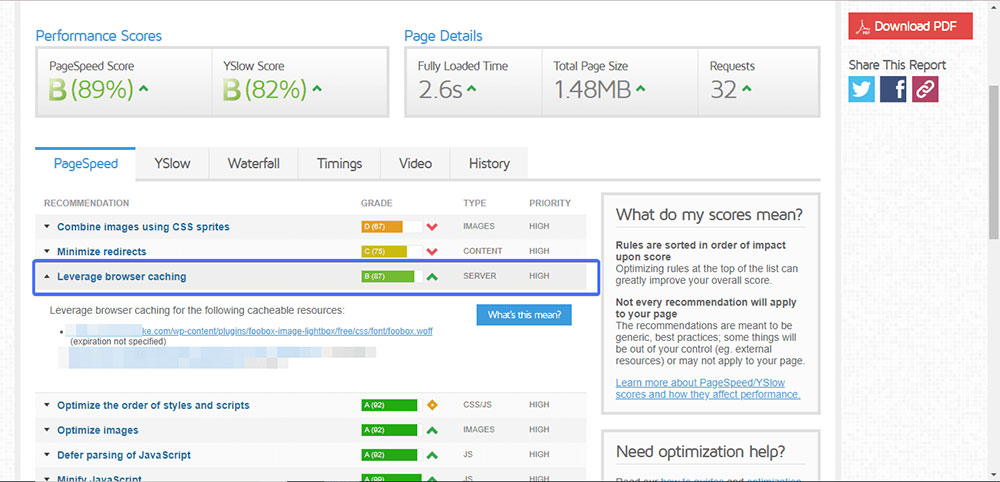
Expires headers are heavily connected to the cache of a website, which makes understanding the notion of cache necessary before you can understand these headers.
Your website is made from a certain number of static files, which can be either HTML files, JavaScript files, or CSS files. These files are needed to load your page, and they rarely change. When the HTTP requests come from the server, the browser will check whether these files are still in place or if they have expired.
Browsers use cache to remember the files that were used for loading your page on previous requests. To avoid long loading times, the server will refer to this cache and load the files that were used beforehand to avoid loading them again. It is likely that if you accessed a website or your page yesterday, the same files would be used for loading the page as they have likely not changed.
Web servers operate in a different way; they often load the files, again and again, each time you load up the page. But what if you could store those files in the browser’s cache, and instruct your browser to load them from the cache? The files would be loaded from the browser’s cache, instead of the webserver, which would significantly increase the speed at which your page is loaded.
That is what expires headers can do. They can instruct your browser to request the files from the webserver, or to load them from the cache of your browser. You can add expires headers to reduce the number of HTTP requests made from the server, and consequently, lower the loading times. The browsers will also use cache for larger files, such as.jpg, .gif, .png, and similar file types. The net result is that the server load drops, and your site can withstand the same traffic levels on a cheaper hosting plan. In other words, you can save yourself quite a lot of cash by installing one of the many cache plugins available in the official WordPress repository. This is not the only advantage, though.
Expires headers make the website faster overall. You can add expires headers for specific files, or you can use it for all types. You can edit the expiry times according to the content on your website. For example, if your website uses files that will remain unchanged for a long time, you should set longer expiry times. If the data changes, then you would get set shorter expiry times.
Add Expires Headers on Apache Webserver
One of the most popular platforms for controlling the cache is Apache, which is a server language that configures the expires module.
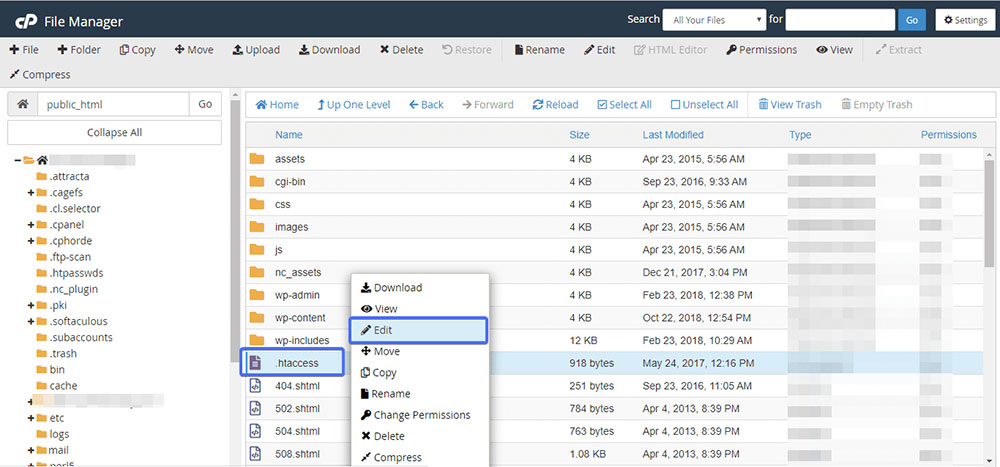
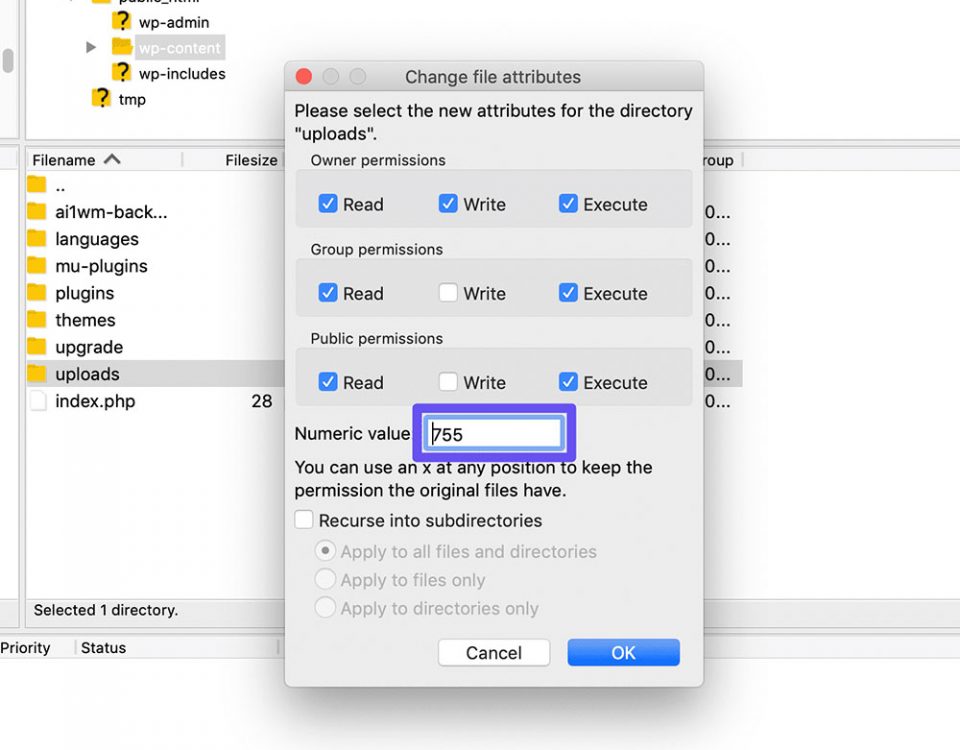
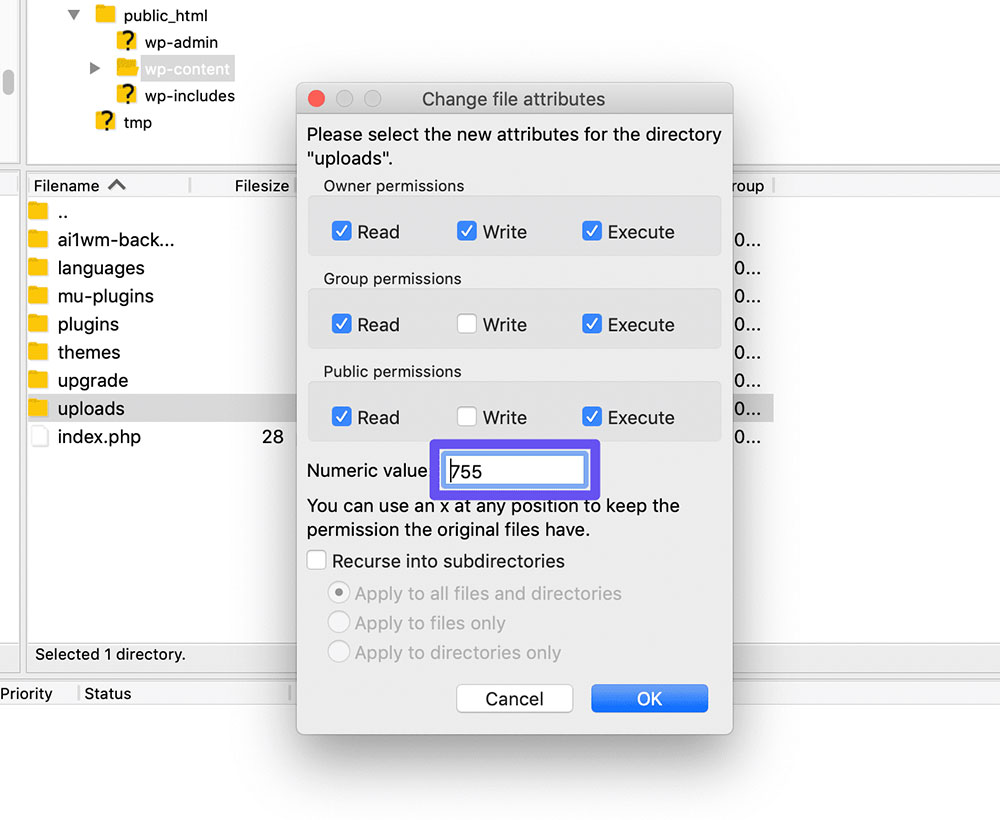
If you want to add expires headers or configure them on Apache, you will need to access your .htaccess file first. While you can use either cPanel or FTP to do this, it is easier to do it with cPanel. Here are the steps to take with cPanel:
- Log into your account of cPanel and click on the File Manager icon.
- Open the section public_html by double-clicking.
- Locate the .htaccess file and right-click on it and select Edit.
Copy and paste the following passage of code into the file:
<IfModule mod_expires.c>

  ExpiresActive On

  # Images

  ExpiresByType image/jpeg "access plus 1 year"

  ExpiresByType image/gif "access plus 1 year"

  ExpiresByType image/png "access plus 1 year"

  ExpiresByType image/webp "access plus 1 year"

  ExpiresByType image/svg+xml "access plus 1 year"

  ExpiresByType image/x-icon "access plus 1 year"

  # Video

  ExpiresByType video/mp4 "access plus 1 year"

  ExpiresByType video/mpeg "access plus 1 year"

  # CSS, JavaScript

  ExpiresByType text/css "access plus 1 month"

  ExpiresByType text/javascript "access plus 1 month"

  ExpiresByType application/javascript "access plus 1 month"

  # Others

  ExpiresByType application/pdf "access plus 1 month"

  ExpiresByType application/x-shockwave-flash "access plus 1 month"

</IfModule>
Save the file and upload it again.
The code above will set the expiry dates for images to one year. CSS and JavaScript files will be replaced every month and removed from the cache. It gives them an expiry date of two months from the moment you upload the file. You can configure expiry dates to precision using counters like years, months, weeks, days, hours, minutes, and seconds. This allows you to configure the cache with precision.
This code will set the expires headers for specific file types. This is how you add expires headers to Apache. This code will also do the following:
- Enable the module with ExpressActive.
- Set the default duration of the cache with ExpiredDefault.
- Define the duration of a specific file with ExpiresByType.
- Reset the Last-modified date.
- Remove the Last-modified date.
- Optimize the response using Cache-control headers for HTTPs and force revalidation of the old content.
Add Expires Headers for Nginx
Nginx works in a different way to Apache in that it does not make use of a specific file like Apache does with the .htaccess file. Instead, you simply need to enter the following passage of code into your server block:
location ~* \.(js|css|png|jpg|jpeg|gif|svg|ico)$ {

 expires 30d;

 add_header Cache-Control "public, no-transform";

}
Use Plugins
You can add expires headers easily by using any of the many plugins that are available to use. Using plugins maybe a good idea for those who have not had much experience in dealing with .htaccess files and adding expires headers safely in the past. There are some great plugins that you can use to do this for you. Here are some of the best we have found.
WP Fastest Cache


This plugin can help you add expires headers, but it will also significantly improve your website security and do cache work for you.
Ending thoughts on add expires headers
Expires headers are a great option when you want to significantly increase the speed of your website. The browser will access your files from the cache, which will increase the speed at which the website is loaded. You can add expires headers to improve the loading times of your website’s pages.
If you enjoyed reading this article on how to add expires headers, you should check out this one about how to update PHP in WordPress.
We also wrote about a few related subjects like how to edit the WordPress excerpt length, how to hide the page title in WordPress, how to set homepage in WordPress, how to remove query strings from static resources, how to backup a WordPress site and how to disable comments in WordPress.
I want to tell you about BeTheme, the definitive multipurpose theme. If trying to satisfy multiple clients has become more stressful than rewarding, BeTheme is the solution for that.

BeTheme’s selection of hundreds of customizable, responsive pre-built websites is the highlight and a proven stress reducer.
The customizability of the theme makes it a dream come true for its users. There are 4 types of Page Builders that you can use with it: WPBakery, BeBuilder, and Elementor among them.
And now with the Live Builder, it’s even more impressive.
Check out BeTheme and see why our users love it!


