


Showcase of Excellent Website Portfolio Design Examples
April 29, 2024
How to add a favicon to your WordPress website easily
May 9, 2024Media content is one of the key features of attractive websites. So all WordPress users should know how to avoid errors with media uploads and how to fix them.
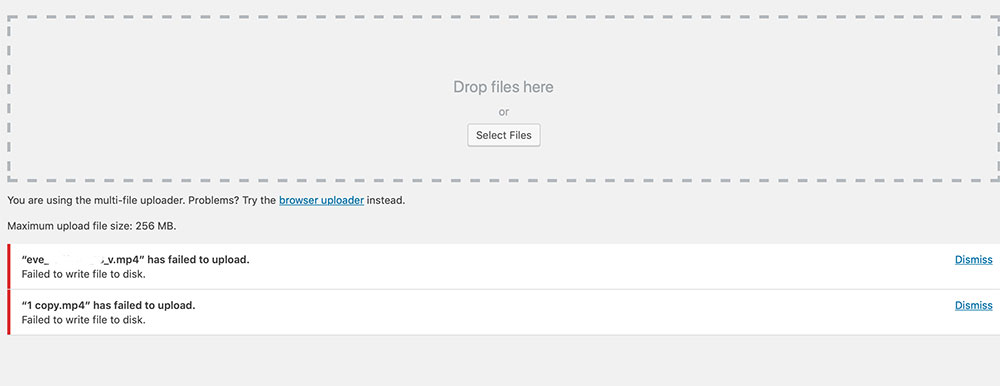
The 'WordPress failed to write file to disk' error makes it impossible to upload a file to the Media Library. There are three main sources of this problem covered in this article.
The troubleshooting isn't difficult. This guide is easy to follow even for beginners.
It outlines how to deal with each of the three common causes. But before fixing it, it's important to explain why the error occurs.
Common Sources of the ‘WordPress Failed to Write File to Disk’ Error
Understanding the problem is the first step of successful troubleshooting. The solution depends on the cause of the issue.
The error has three common sources:
1. incorrect file permissions
2. no more space in the WordPress temporary directory
3. reaching the disk storage limit.
File permissions are part of security measures in WordPress. They control which users can access a file and what actions they can perform.
Incorrect setup can block WordPress users from reading, running, or modifying files hosted on the account.
The uploads folder permissions may prevent certain users from 'writing' to the disk. This includes uploading new files.
This can be the cause of the 'WordPress failed to write file to disk' error. To check if this is your case, use the Site Health tool:
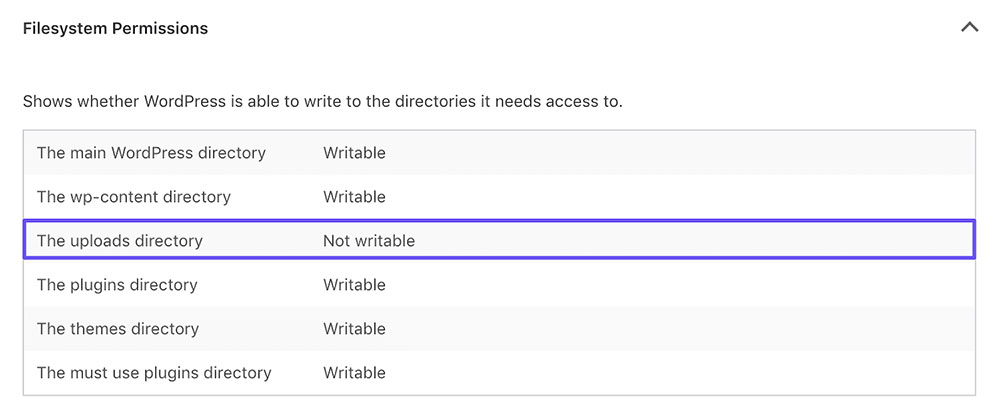
1. Go to the WordPress dashboard menu and click on Tools.
2. Choose Site Health from the list and click on the Info.
3. Go to the last dropdown menu and check the file permissions for the uploads directory. It should be Writable.
If the setting is different, this is the cause of the issue.
Sometimes the source of the error doesn't lie with the file permissions. There's just no more space in the WordPress temporary file directory.
The third common reason why users can't upload files is that they have reached the disk storage limit.
A hosting plan determines how much disk space users have on the webserver. When they run out of space, they can't add any more files and they get the 'WordPress failed to write file to disk' error.
Having identified what's causing the error, follow the instructions below to fix it.
How To Fix the 'WordPress Failed To Write File To Disk' Error
There is a way for users to change the incorrect file permissions. Or they can make more space in the temporary folder.
It's also possible to resolve the problem of exceeding the quota limit. Follow the process below that corresponds with the cause of the error.
How To Fix Incorrect File Permissions
The number one source of the 'Failed to write file to disk' error is incorrect file and folder permissions. File permissions protect websites from unauthorized access and modification that could harm them.
Before a server 'writes' (or uploads) files to any folder, it checks the folder permissions. If the folder permissions prevent 'writing', the web server will block the upload.
The basic rule in WordPress for correct folder and file permissions is 644 for files and 755 for folders. Users can change the incorrect permissions via an FTP client, cPanel, or SSH.
Here are the instructions for each process.
How To Change Folder and File Permissions Via an FTP Client
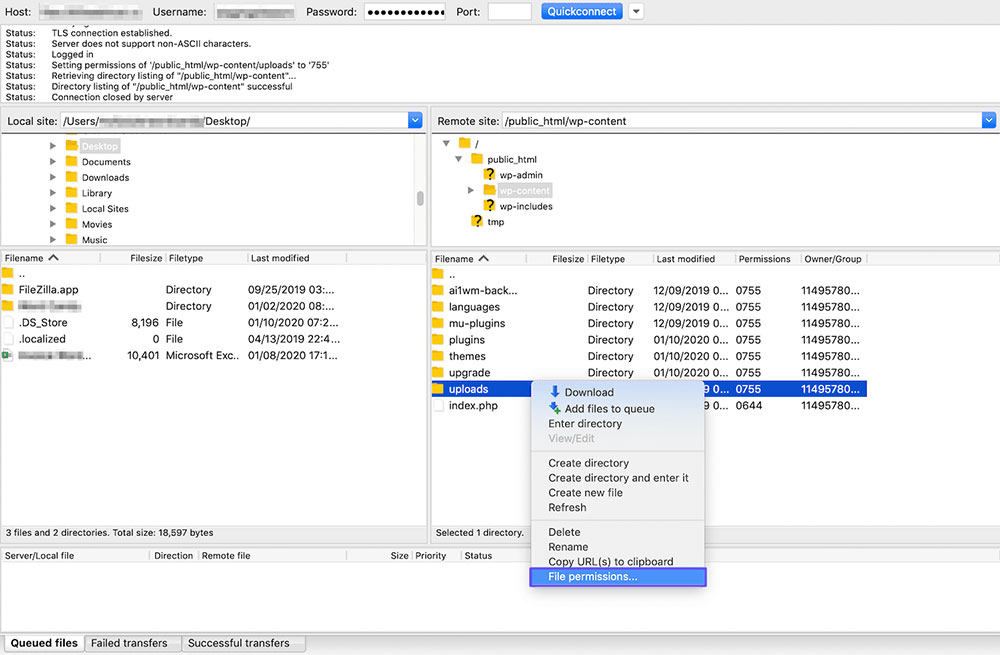
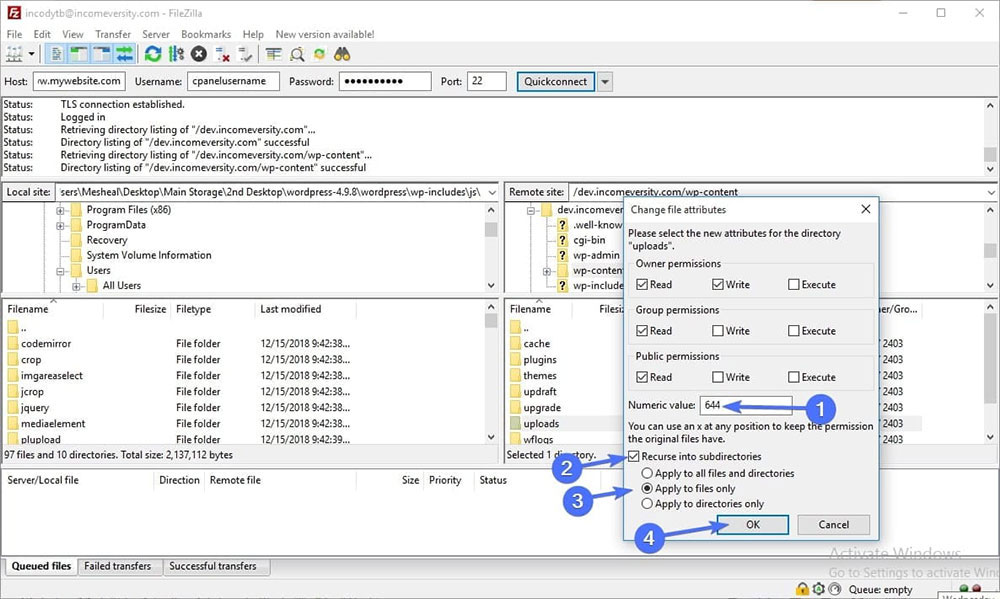
1. Log in to an FTP client, such as FileZilla. Check the hosting account dashboard to find your credentials.
2. Go to the root folder public_html > wp-content.
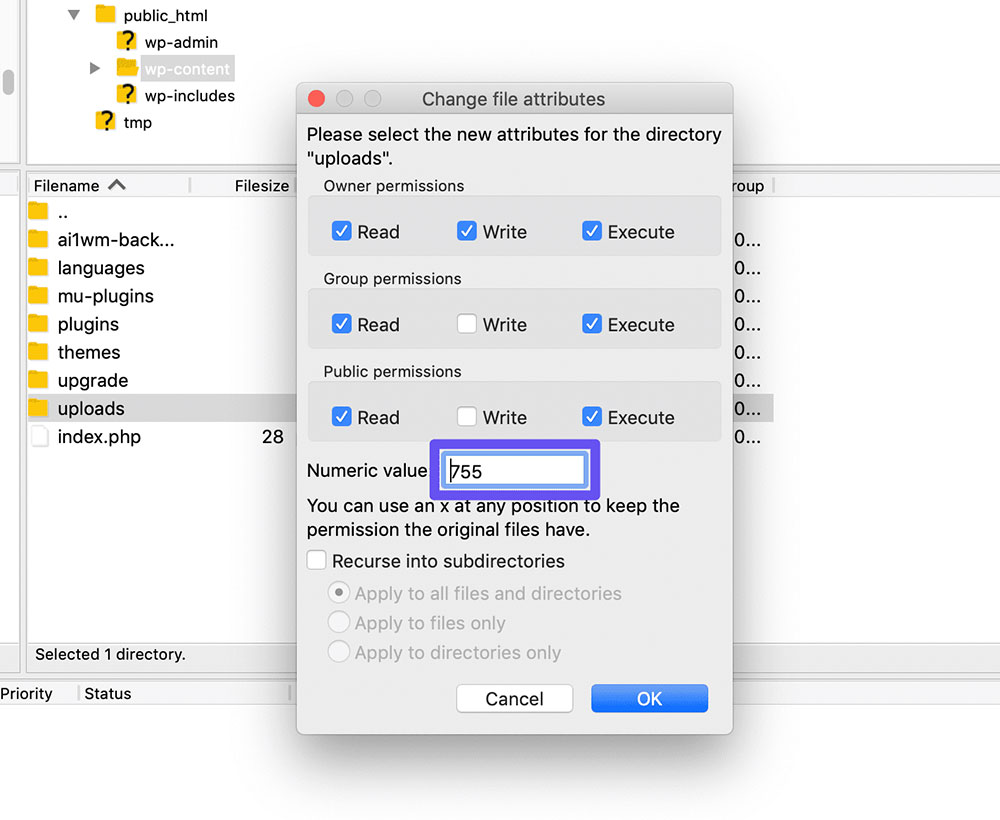
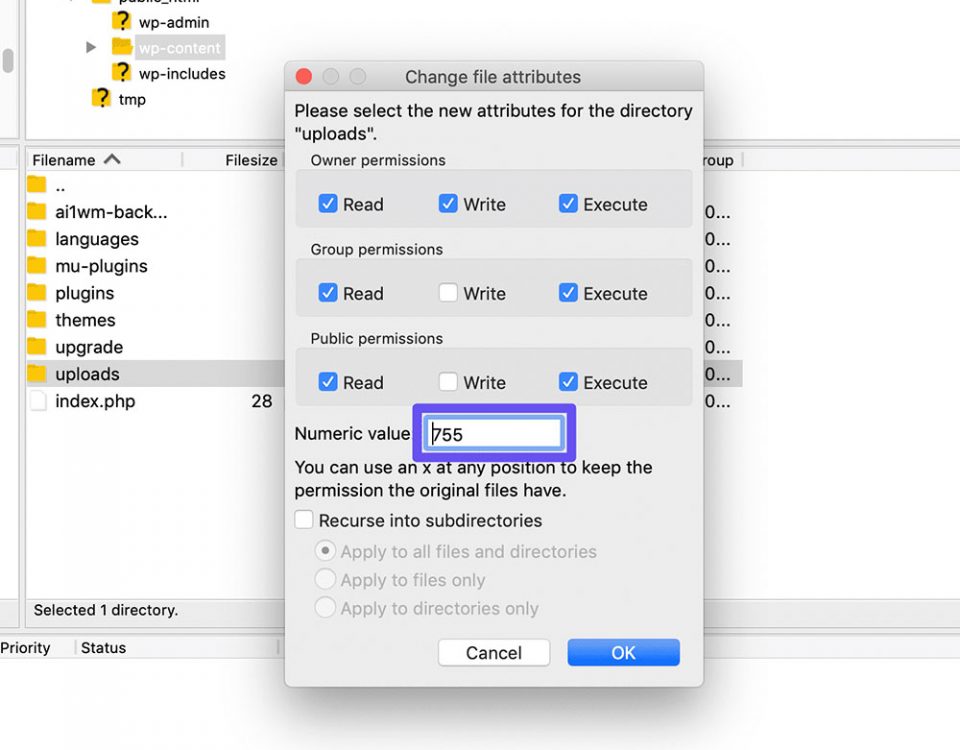
3. Right-click on the wp-content folder and select File Permissions. The file permissions dialog box will open.
It displays the current settings for Owner permissions, Group permissions, and Public permissions.
4. Enter 755 as the Numeric value.
5. Tick the box 'Recurse into subdirectories'.
6. Select 'Apply to directories only'.
7. Press 'OK'.
The FTP client uses the 755 permissions for all subdirectories in the wp-content folder. So it will change the permissions for the Uploads folder within the wp-content too.
Next, set up the individual file permissions inside the wp-content folder. Here are the steps:
1. Locate the wp-content folder and right-click on it.
2. Select File Permissions.
3. This time set the Numeric Value to 644 in the file permissions dialog box.
4. Tick the box ‘Recurse into subdirectories’.
5. This time, select 'Apply to files only'.
6. Press 'OK'.
The FTP client uses the 644 permissions for all files within the wp-content folder. This includes Uploads.
This process should remove the 'Failed to write file to disk' error and the upload should be working again.
How To Change Folder And File Permissions In cPanel
1. Open cPanel.
2. Go to the File Manager.
3. Choose the name of the file to modify.
4. Select the option 'Change permissions'.
5. Set up the correct numeric value.
6. Click on 'Change permissions'.
How To Change File Permissions Via SSH
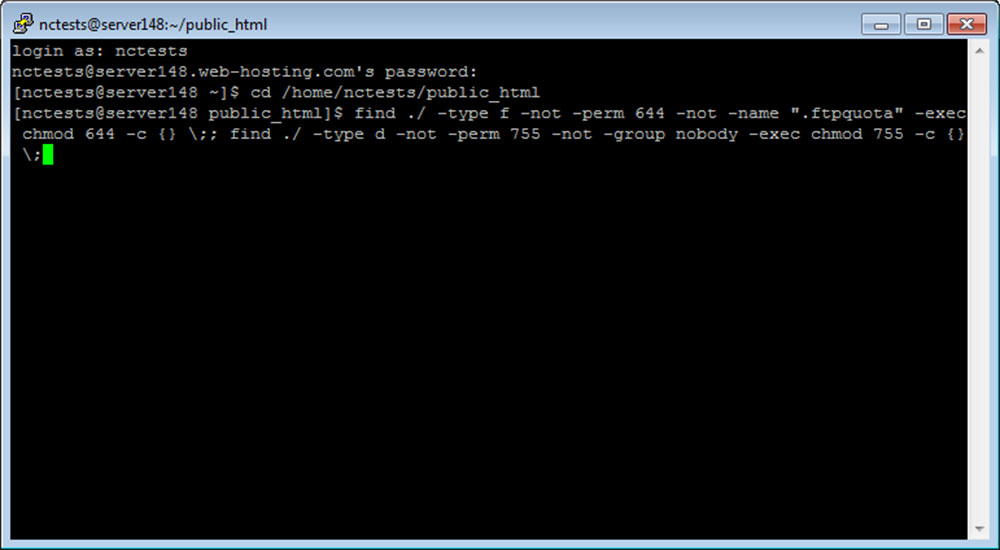
1. Go to the WordPress root folder. If your WordPress files are in the public_html folder, execute: cd public_html
2. Set the permissions to 755: chmod 755 wp-content
The wp-content folder’s permission will be set to 755. To set the same permissions to all files and folders inside the wp-content folder, add the -R flag before 755 in the command.
How To Clear the WordPress Temporary Folder
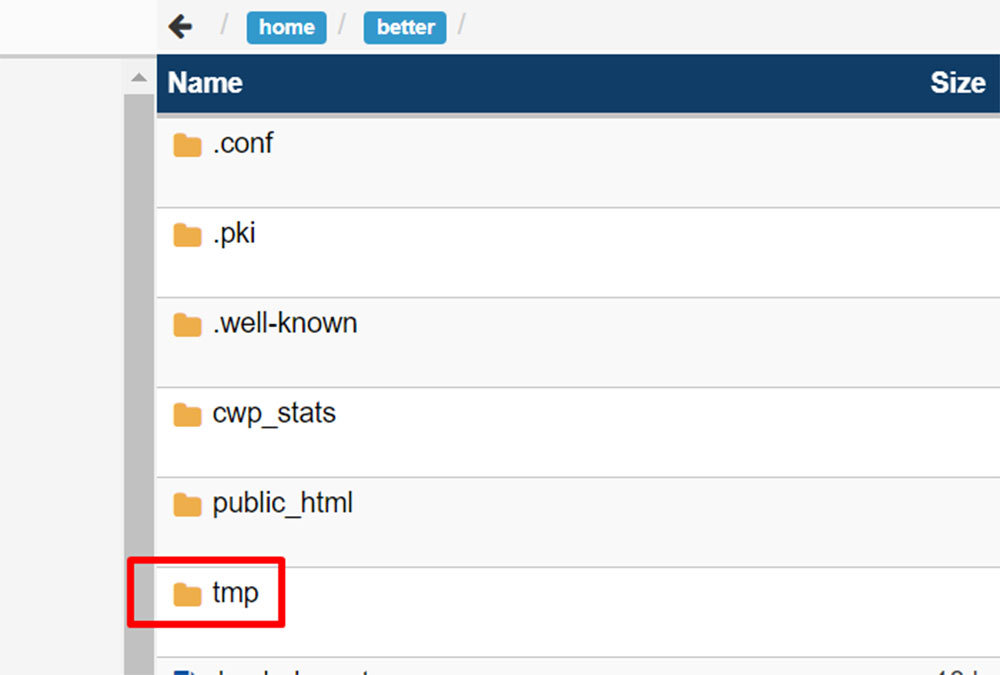
WordPress file permissions aren't the only cause of the 'Failed to write file to disk' error. It may be necessary to empty the temporary file directory.
WordPress uses a temporary folder on a webserver to temporarily store the files users upload. From there the files can be moved to the Uploads folder.
But if there is not enough room in the temporary folder, users get the 'Failed to write file to disk' error.
If that's the case, contact the web hosting provider. It's not possible to clear the temporary files directory using FTP.
How To Fix Exceeded Server Storage Space

A web host provider usually offers different plans. These allocate a certain amount of storage space to a website on a server.
The maximum storage limit is also called the 'quota limit'.
When users exceed their allocated storage space, they can't upload more files. Instead, they will get the 'WordPress failed to write file to disk' error.
If you think this is the cause of the upload problems, contact the web hosting provider. It may be possible to change plan and get more disc space.
Another option is to free up some storage space by deleting old files that are no longer needed. Do this using FileZilla or cPanel.
FAQ about the WordPress "failed to write file to disk" error
Why am I getting the "failed to write file to disk" error in WordPress?
This error often results from file permissions issues, a full disk space, or incorrect server configuration. The server might be unable to write to the designated upload directory due to these constraints, leading to the error message when attempting file uploads.
How do I check file permissions in WordPress?
To check file permissions, use an FTP client to access your WordPress files. Navigate to the wp-content directory, right-click, and select permissions. Ensure folders are set to 755 and files to 644. This helps resolve file upload errors and ensures proper write permissions.
What should I do if my disk space is full?
If disk space is full, you'll need to delete unnecessary files or upgrade your hosting plan. Check your hosting control panel for disk usage details. Freeing up space or upgrading ensures sufficient room for WordPress to write files to disk without encountering errors.
How do I configure the temporary folder in WordPress?
Set a custom temporary directory in the wp-config.php file. Add this line: define('WP_TEMP_DIR', ABSPATH . 'wp-content/temp/');. Ensure the temp folder exists and has the correct permissions. This step resolves issues with missing temporary folders, aiding in file uploads.
What is the role of the PHP settings in this error?
PHP settings, especially those related to upload_max_filesize and post_max_size, affect file uploads. Adjust these settings in your php.ini file or via your hosting control panel. Increasing these limits can prevent the "failed to write file to disk" error, allowing larger file uploads.
Can I fix this error using the hosting control panel?
Yes, use your hosting control panel to adjust file permissions, increase disk space, and configure PHP settings. Navigate to the file manager or PHP settings sections to make necessary changes. These tweaks can resolve the "failed to write file to disk" issue efficiently.
How do I diagnose server configuration issues?
Check server logs for detailed error messages. Use tools provided by your web hosting service or access logs via FTP. Look for entries related to file system errors or PHP configuration issues. Diagnosing these can pinpoint the exact cause of the error.
What if my FTP permissions are incorrect?
Incorrect FTP permissions can prevent WordPress from writing files. Access your site via an FTP client, and verify the permissions on your wp-content directory and its subdirectories. Ensure they are set to 755 for directories and 644 for files to allow proper access.
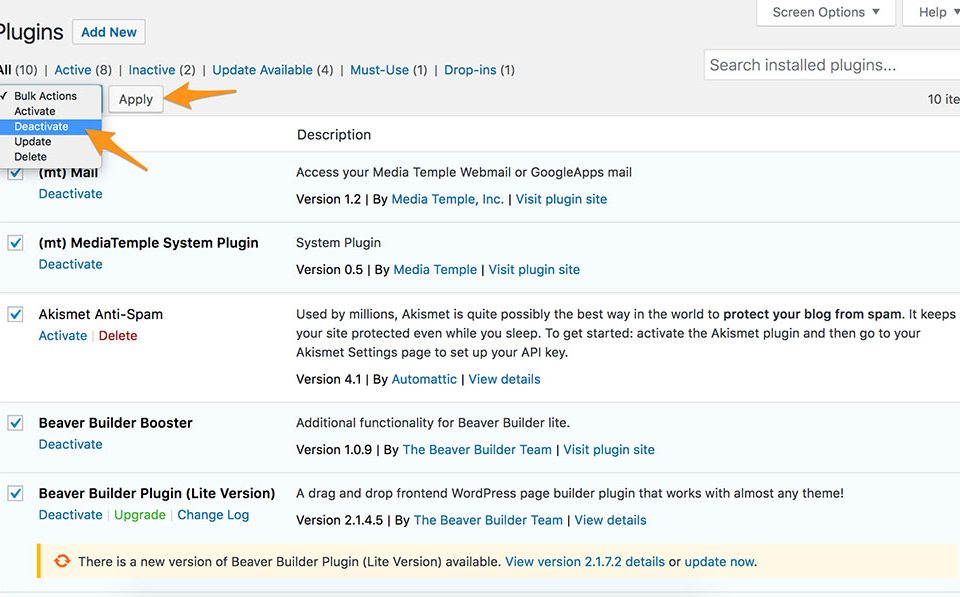
How do security plugins affect file upload errors?
Some security plugins may restrict file uploads to protect your site. Review your security plugin settings for any rules affecting file permissions or uploads. Temporarily disable the plugin to see if it resolves the issue, then adjust settings accordingly to balance security and functionality.
Why is the .htaccess file important in resolving this error?
The .htaccess file controls many aspects of your site's server behavior. Incorrect settings here can cause file upload issues. Check for any directives that might affect permissions or temporary folders. Adjusting or resetting the .htaccess file can sometimes fix the error.
How can I recover any lost data or files due to the "failed to write file to disk" error in WordPress?
You can try to use backups to get back any lost data or files caused by the "failed to write file to disc" error in WordPress. If you have a backup of your site, you can restore it to a previous version and get back any lost data. If you don't have a backup, you can try to get any lost files or data back with a data recovery tool.
But it's important to remember that recovering lost data can be hard, and it's not always possible to get all of it back. To avoid possible data loss, it's important to have a backup plan in place.
Conclusion
Fixing the WordPress failed to write file to disk error isn't just about resolving a single issue—it's about understanding the intricate dance between file permissions, server configuration, and disk space. By addressing these key areas, you ensure your WordPress site remains functional and efficient.
Remember to:
- Check and correct file permissions using your FTP client.
- Free up disk space or upgrade your hosting plan if needed.
- Configure your temporary folder properly in the wp-config.php file.
- Adjust PHP settings to accommodate larger file uploads.
Dive into your server logs for detailed insights and don’t overlook the potential impact of security plugins and the .htaccess file. Each of these steps is crucial for maintaining a smooth, error-free WordPress experience.
If you enjoyed reading this article on WordPress failed to write file to disk error, you should check out this one about WordPress briefly unavailable for scheduled maintenance error.
We also wrote about a few related subjects like failed to open stream error, WordPress post missed schedule, failed to load resource error, WordPress posting to Facebook done automatically, Wordpress mixed content errors, how to reorder pages in WordPress and WordPress updating failed error.


